
Adding a User Specific Listing KPI in MEX Dashboard
In the latest release of the MEX CMMS, the Dashboard has taken on a new level of functionality. The ability to reference the current user’s data with @ContactID. In this article we will take a look at this new functionality by creating a new KPI to return pending work data assigned to the current user account.
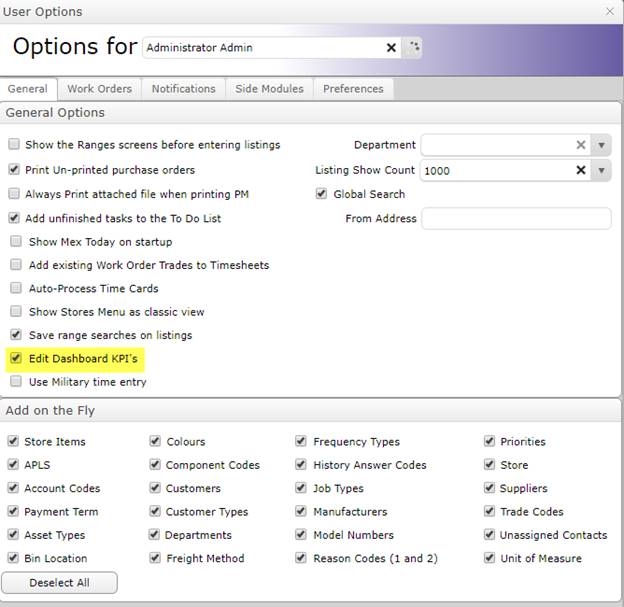
Please take note that in order to create and edit Dashboard KPIs, this will need to be enabled in your User Options;
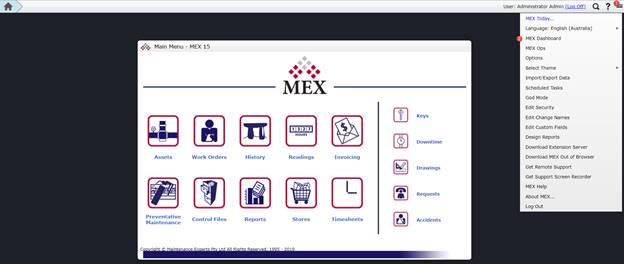
Once you’re able to access your MEX Dashboard from the hamburger menu found in the top left-hand corner of your MEX screen;
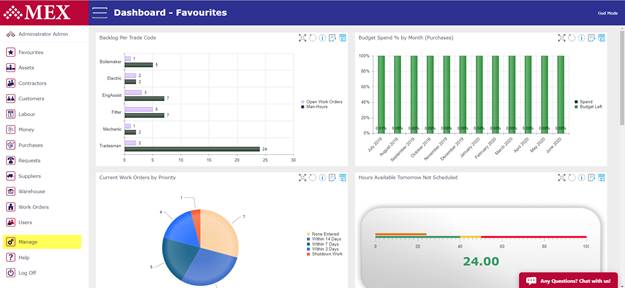
Once in the Dashboard, login with your standard MEX account credentials. On the left-hand side of the screen, underneath the different Categories, you’ll see an option that says ‘Manage’. Select this option to bring up another dialogue box.
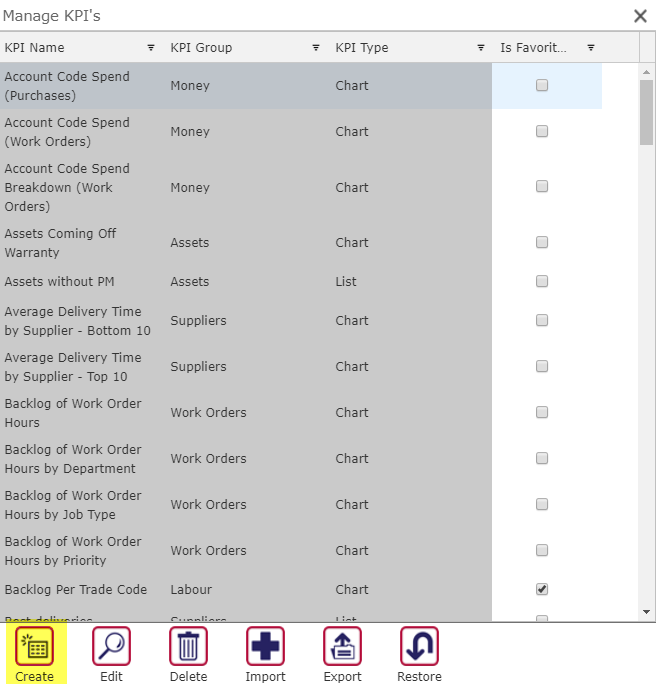
Once in the ‘Manage KPIs’ area, scroll down to the bottom to see additional options. We’re going to select the ‘Create’ button;
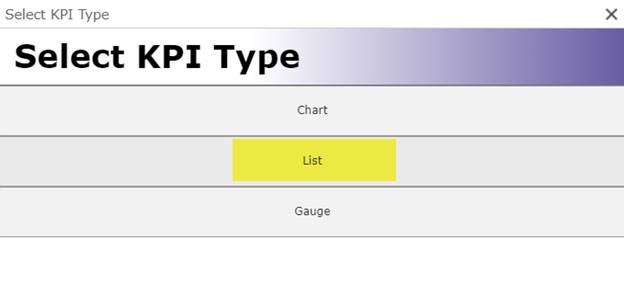
Next, when prompted, we’re going to select the KPI type – in this example, we will select ‘List’ for a list of results.
In the next screen, we are shown a box with the KPI details. Let’s begin by populating the Name and Description fields, for our example:
Name: Work Assigned to Current User
Description: A list displaying which work orders that have the current user assigned as a trade name.
Group: Work Orders

Next, to add our datasource (SQL Query), we’re going to enter our query underneath the ‘List Datasource’ section on the KPI Details screen. We also need to make sure that the ‘Number of Columns’ and the name of our columns appropriately matches our datasource query.
List Datasource:
SELECT WorkOrderNumber,
WorkOrderDescription,
tradeCodeName,
isnull(WOT.duestartdatetime,Wo.DueStartDateTime) as DueStartTime
FROM WorkOrder WO
LEFT JOIN WorkOrderTrade WOT ON WO.WorkOrderID = WOT.WorkOrderID
LEFT JOIN TradeCode TC ON WOT.TradeCodeID = TC.TradeCodeID
LEFT JOIN WorkOrderStatus WOS ON WO.WorkOrderStatusID = WOS.WorkOrderStatusID
WHERE WorkOrderStatusFunctionName NOT IN (
'Closed',
'Cancelled'
)
AND WOT.TradeContactID = @ContactID
Number of Columns: 4
Column 1 Name: WO #
Column 2 Name: WO Description
Column 3 Name: Trade Code
Column 4 Name: Due Start Date
Please note, the above SQL query is a simple example for the purposes of this tech tip – this is a simple listing of trade codes assigned to open work orders, then limited to only return records that are assigned to the user running the KPI (Highlighted Section).
Once you’ve filled out those details, exit out of this screen to save by selecting the X button in the top right.
From the ‘Manage KPIs’ screen, you can choose if you wish to make your newly created KPI a ‘Favourite’, meaning it appears upon the first loaded screen of the MEX Dashboard. Close out again to save.
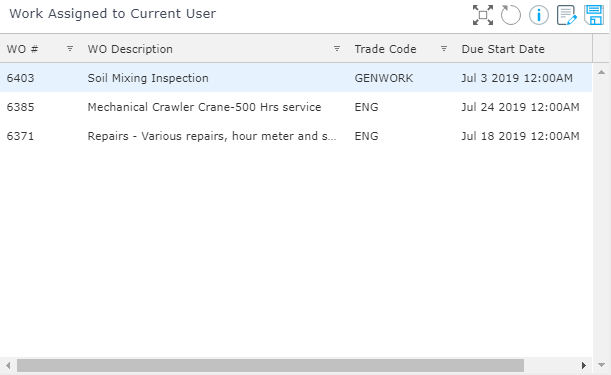
Navigate to the ‘Work Orders’ category on the left-hand side of the Dashboard. You should now see your newly created KPI displaying which work orders are assigned to the current user.
User A Results:
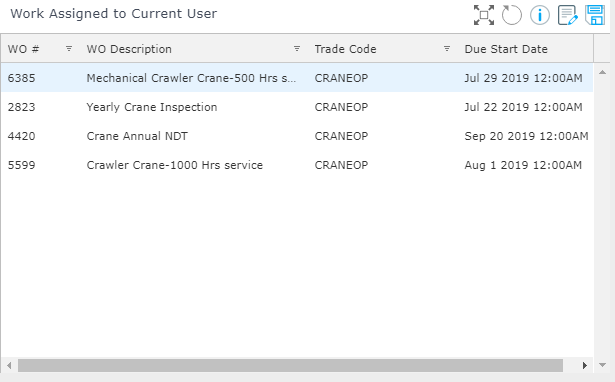
Next, if we try to login as another user and see a different set of results, we know the KPI is working as intended.
User B Results:
See how you go with this
As a reminder, writing these SQL queries for KPIs is not covered by the Support agreement, however our team are always on hand to help answer your questions as best we can, and steer you in the right direction to get the data you need in your listings. You can reach MEX Support on support@mex.com.au or on +61 7 3392 4777.