
Adding Custom Fields to Screens in MEX
The MEX "Custom Fields" function allows you to add your own additional fields to the majority of the main screens in MEX. For example you might want to add a "Responsible Person" drop-down to the Work Order’s Details screen, so you would use the Custom Fields function to do this.
Once you have added a field to a screen you can also:
- Add the field to the relevant listing. For example any fields that you add the the Work Order’s Details could be displayed in the Work Order Listing.
- Use it in reporting. Note that that if you do wish to include a custom field in a report, you will need to modify the report using MEX Utilities.
The majority of the field types found in MEX can be added as custom field including text fields, drop-downs, date fields, check-boxes etc. There is also the ability to add "Data Derived" fields, which will display a value based on an SQL query that you construct for the purpose.
The types of field that are available for addition are:
- Check Box
- Currency
- Date
- Time
- Number
- Number with decimals
- Percent
- Text Box
- Drop Down
- Data Driven
- Signature
- Map
- Image
- Document
- Ellipses
- Custom Control
Adding Your Own Field
To add a custom field to MEX follow this process:
- Navigate to the screen that you wish to add the custom field to. For example, if you want to add a custom field to the Work Order, then open up the details screen for any Work Order.
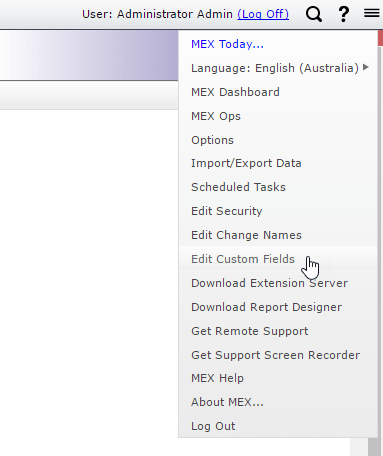
- From the MEX Hamburger Menu in the top right hand corner, scrol down and select ‘Edit custom fields’ .This will bring up the "Custom Fields" screen for the screen that you currently viewing.
Accessing the Custom Fields Screens
- If the screen that you are viewing is able to have custom fields added to it, then the Custom Fields Setup screen will be displayed as shown below. Custom fields may be placed into designated areas on each screen. These areas are displayed as green boxes. If a screen has multiple tabs, then each tab may have its own Custom Fields Area located within it. For the tabs that display listings (such as the Work Orders Trade’s tab) adding a custom field to the tab will add it as a new column in the listing.
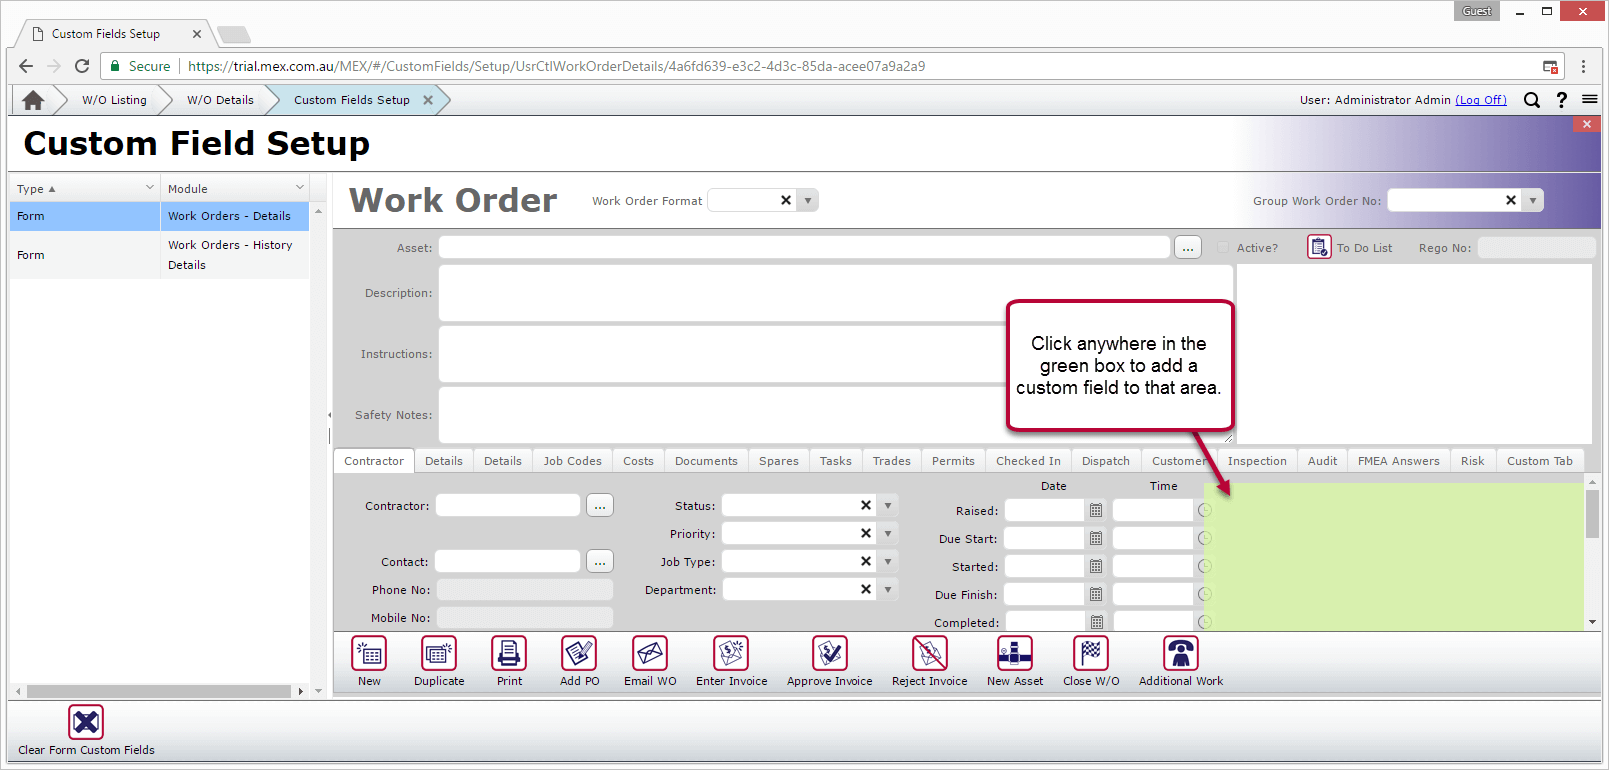
The Custom Fields Setup Area
Click anywhere in the Custom Fields Area to open up the Custom Field List for that area.
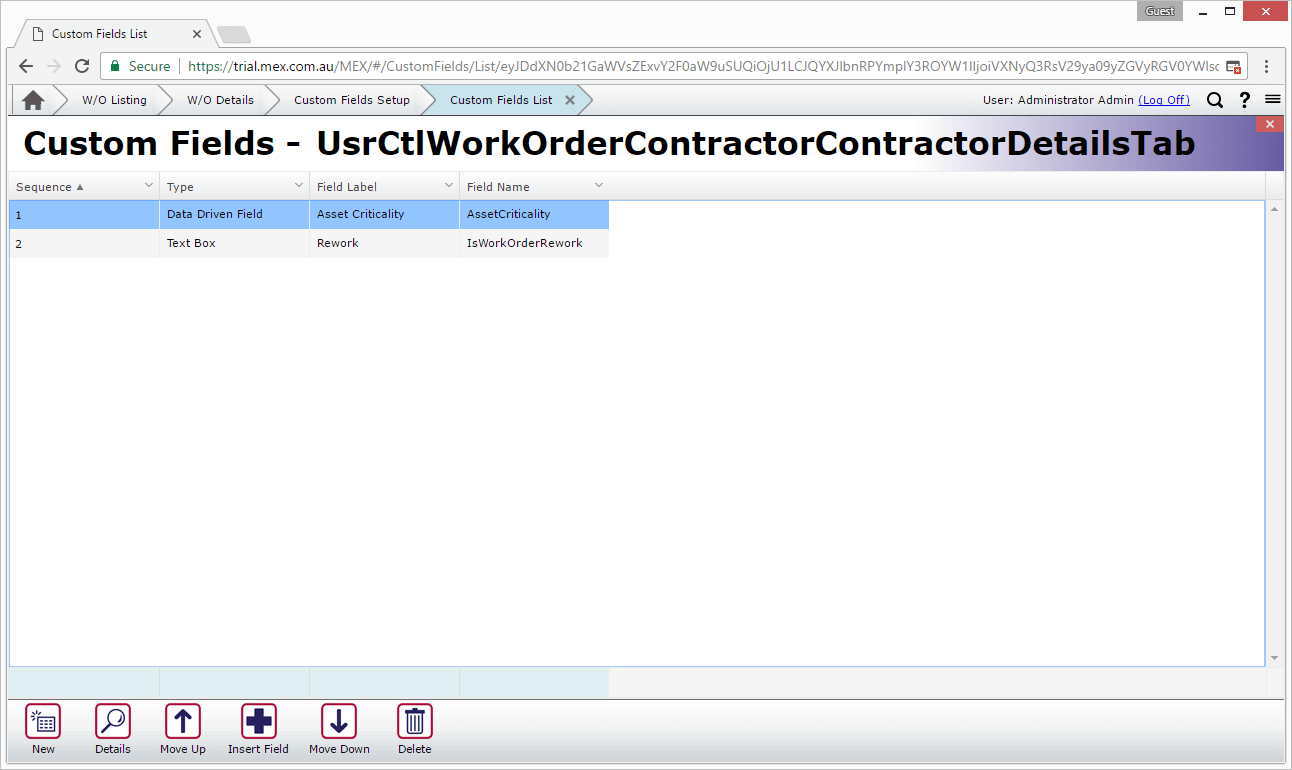
The Custom Field List
- In the Custom Field List, click on "New" to open up the Custom Field Setup screen. This is where you will designate what type of field you are adding and what it will be called in the system.
- Here you can select the type of field,
- Enter the Label name,
- Enter the Name to be used to identify this new field in reports and listings,
- Enter the help tip and depending on the type of field you may be required to enter the Default value.
- Close the Custom Field Setup screen to return to the Custom Field List. You can now position your field relative to any custom fields that you have defined for the area by moving it up and down in the list with the "Move Up" and "Move Down" buttons. When multiple custom fields are added to a screen they are generally organised into two or three columns within the screen’s Custom Fields area, left-to-right and top-to-bottom. The field’s position within the Custom Fields Area is determined by its position in the list. The exception to this is a listing tab, in which all fields are added as additional columns to a listing.
Close the Custom Field List, and then close the Custom Field Setup screen. The custom field has now been added to the system.
For more information or help with this, contact the MEX Maintenance Software Support team at support@mex.com.au or call +61 7 3392 4777