
Configuring Custom Modules in MEX
Do you have a need to store a particular piece of information in MEX, but just can’t find the right place to save it?
Well, on top of allowing users to now add their own fields throughout the MEX system, now you can create a whole new Custom Module of your choosing.
There are two custom modules available in MEX, and each module contains:
- A listing screen, which displays a list of the records that have been added to the module.
- A details screen, which is used to create and edit a record in the listing. The details screen contains two basic tabs, two listing tabs and a documents tab.
Configuring a Custom Module
Configuring a Custom Module in MEX always follows these steps
Display the Custom Module on the MEX Main Menu
- Go to the MEX menu bar and select the Hamburger Menu (three horizontal lines) in the right-hand top corner and select ‘Options’.
- In the user Options screen, go to the "Side Modules" tab.
- Select a Custom Module (e.g. Custom Module 1) and click the --> Button to add it to your side modules.
- Close the User Options screen
At this point the module will be called "Custom Module 1" in the Main Menu.
Customise Your Modules Screen
Now you need to add the necessary files to your new module’s Details screen.
- In the Main Menu, click on the "Custom Module" button that you have just added. It will be on the right-hand side.
- Click on the "Setup Module" button in the top right-hand corner of the Listing screen to open up the Setup options for the Custom Module.
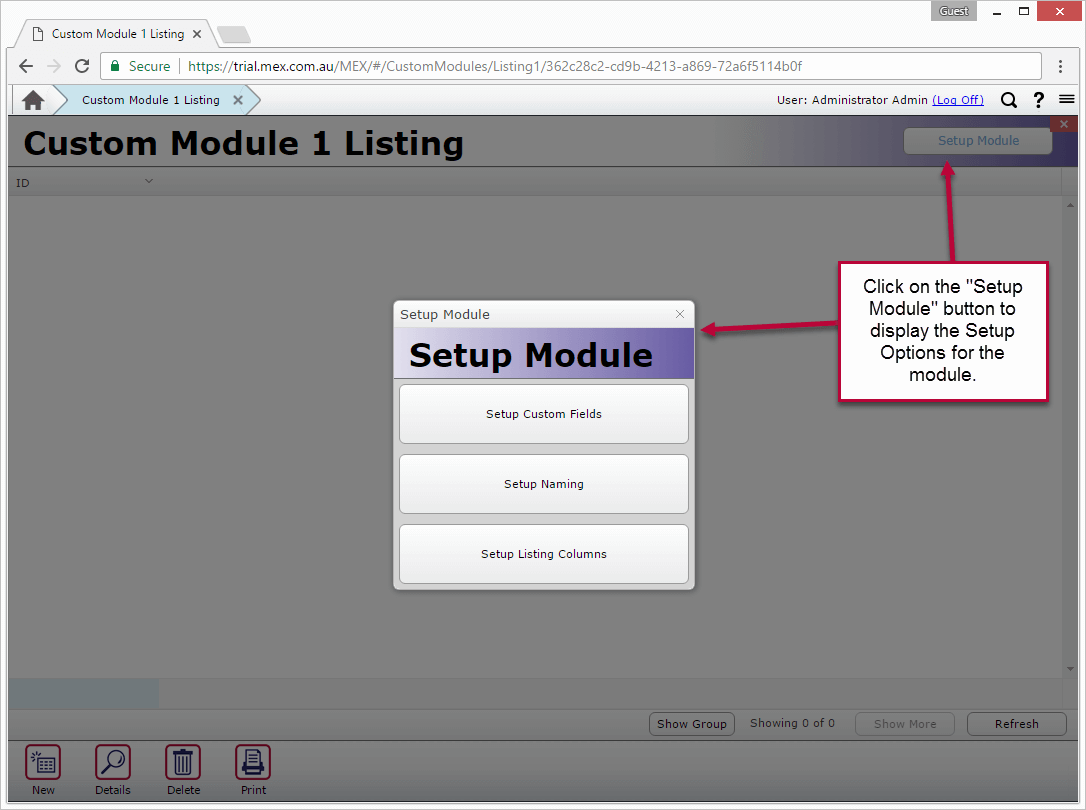
Accessing the Setup Options
- Click "Setup Custom Fields"
You will notice that for the Custom Module we have a template that contains a Header, two Details tabs, two Listing tabs and a Documents tab.
You can then proceed to adding your required fields within the new module by clicking the green “Click to add Custom Fields” areas on the module.
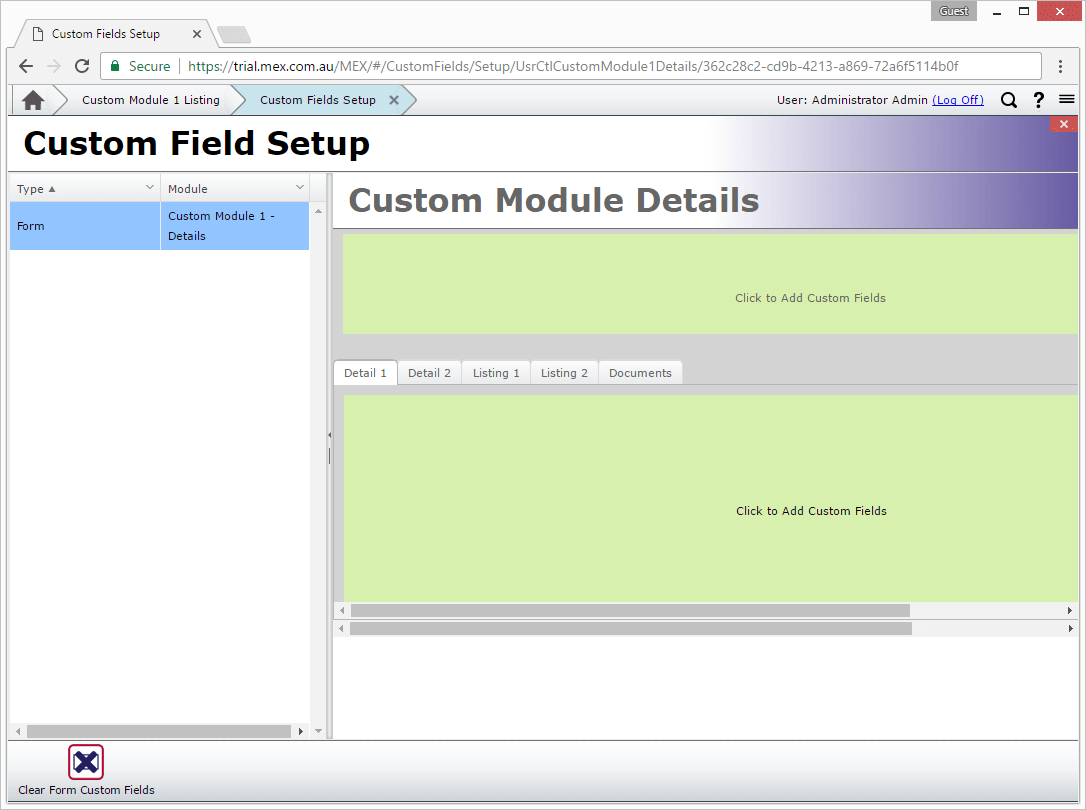
Adding fields to the Details Screen
Refer to the Adding Custom Fields to MEX article for information on how to add the fields.
After all necessary fields have been added to the details screen, close the Custom Fields Setup screen to return to the module’s listing.
Change the Names of your Labels
Now you will need to give the appropriate names to the screens and tabs in the new module.
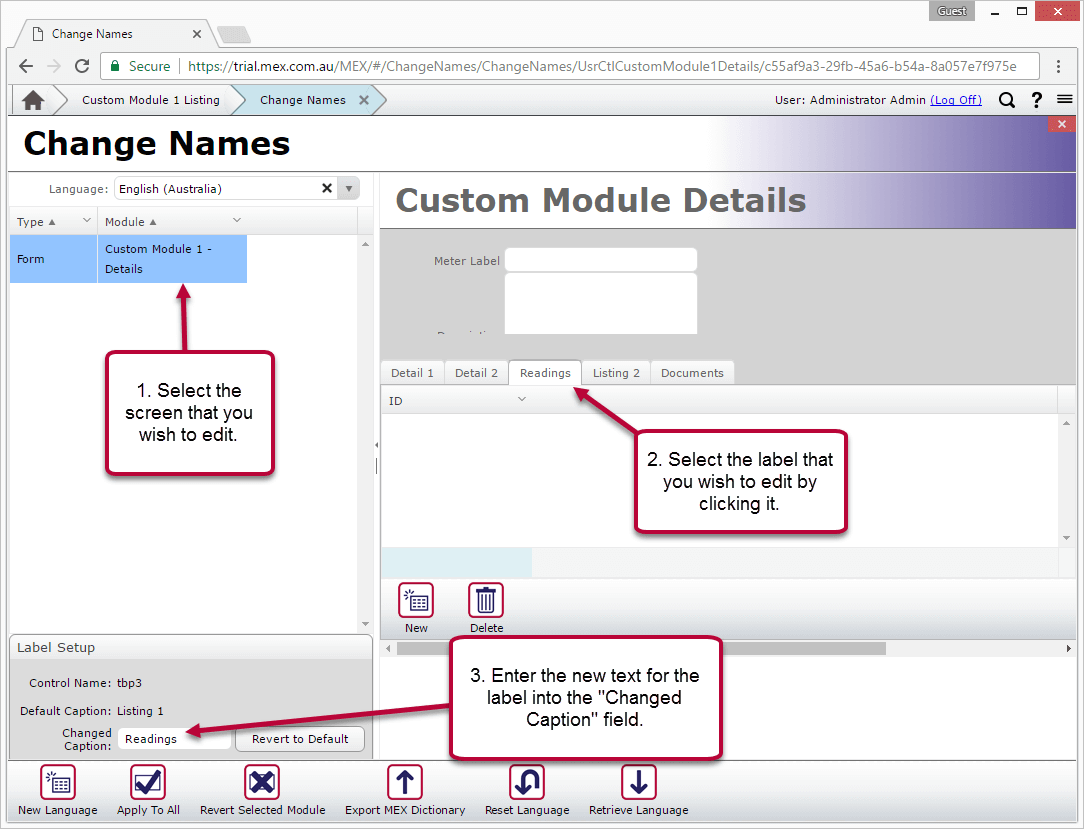
- In the Custom Module Listing screen, click on the "Setup Module" button and click the "Setup Naming" button.
- You can then change the name of your labels in the new module by selecting the label you wish to change and adding your new name in the Changed Caption text field.
Configure the Custom Module’s listing screen
Once the fields have been added to the module’s Details screen, Do this by selecting fields from the Details screen to display in the listing. Again, the process for adding columns to a Custom Module’s Listing screen is roughly similar to that of adding listing columns elsewhere in the system.
- In the Custom Module Listing screen, click on the "Setup Module" button and click the "Setup Listing Columns" button to open up the "Configure Columns" screen for the Custom Module.
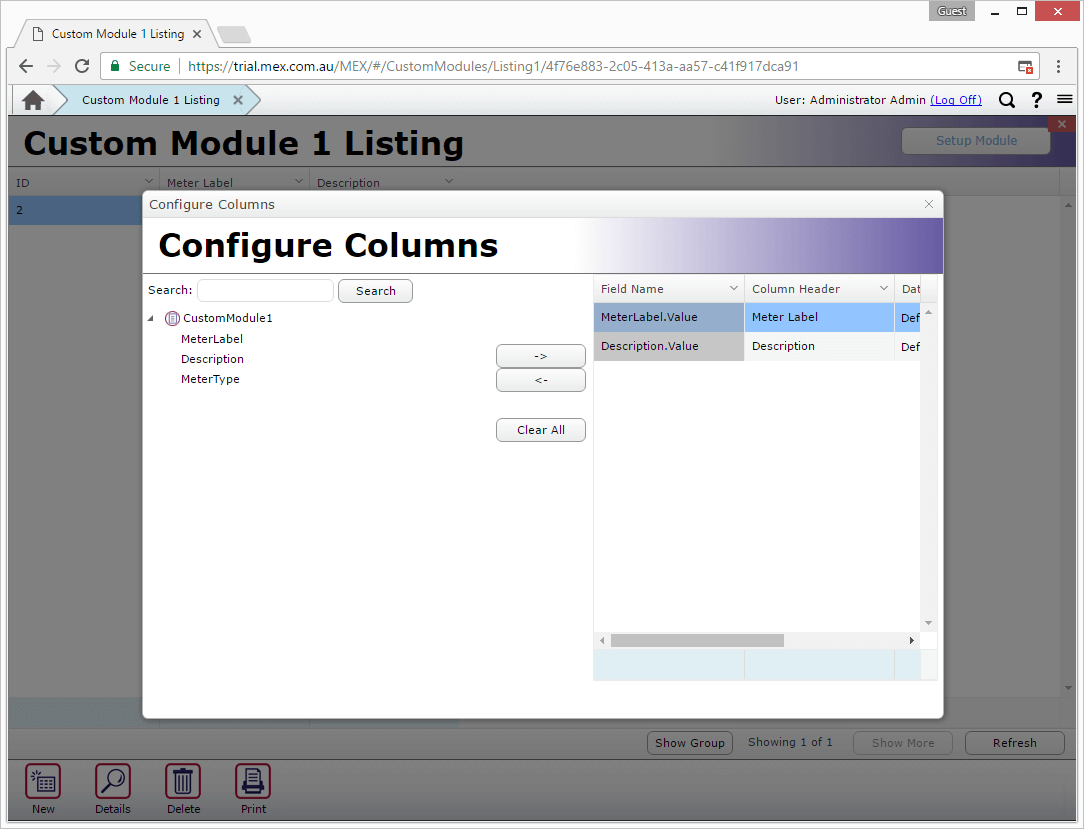
Adding Columns to the Listing
- The left-hand listing in the Configure Columns screen displays a list of the fields that are available to be added to the module’s listing screen.
- Select a field in the left-hand listing and click on the "->" button to include the field in the module’s listing. The selected fields are displayed in the right-hand listing.
- Optionally, edit the name of the new column in the "Column Header" field in the right-hand listing.
- Continue to add the required fields to the listing. Once the listing has been configured, close the Configure Columns screen to return to the module’s listing screen.
That’s pretty much it. Optionally, remove any surplus tabs from the module’s Details screen using the MEX Security Module. If required, configure the module’s report so that the records may be printed.
Related Blog Articles
For more information or help with this, contact the MEX Maintenance Software Support team at support@mex.com.au or call +61 7 3392 4777