
Creating a New Inspection in MEX
This October is Safe Work Month and equipment inspections are a great way to help keep your staff and assets safe. Having a robust preventative maintenance and asset inspection schedule allows you to combat any operational issues and potentially dangerous breakdowns. Unplanned maintenance poses greater risk to occupational health and safety with a higher risk of incidents occurring in the shutdown and starting up of equipment.
Inspections are a powerful part of MEX that generate work orders designed to ask, record and react to questions. Going from a traditional sense, an inspection would require a separate Work Order for each asset, but this would be too cumbersome, so the MEX inspection module was designed to accommodate the entire plant inspection into one work order. Allowing to inspect your entire operation for any potential issues and raise Work Orders accordingly.
Creating an Inspection
- From the MEX Main Menu click the Preventative Maintenance button
- This will open the PM Listing
- Click the ‘New Inspection’ button
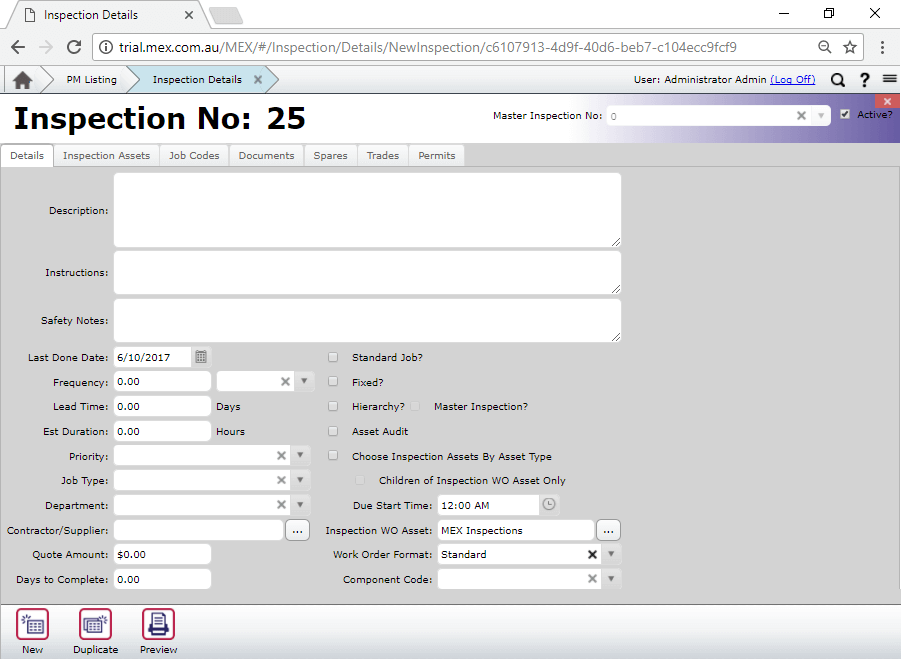
- A blank inspection will now open
- Start by giving the Inspection a description, instruction and safety notes.
- Select a PM Type. More information on these can be found here: Preventative Maintenance Types In MEX
Inspection Assets & Question Sets
For each item this inspection will be affecting, a question set will need to be applied to it.
- To start, we select ‘Inspection Assets’ tab, and from there we can select the Asset being inspected. You can do this individually or in bulk by selecting the ‘Select Assets’, where you can add Assets by Asset Type, Parent Asset, Manufacturer, Model Number or Department.

- Click the ‘New’ button to create a new line, then select the ellipsis button on the question set field to open the Question set window.
- In this window, all questions and answers used in the MEX Inspections are created.
- Select the ‘New Question Set’ button in the bottom ribbon and give the Question set a name.
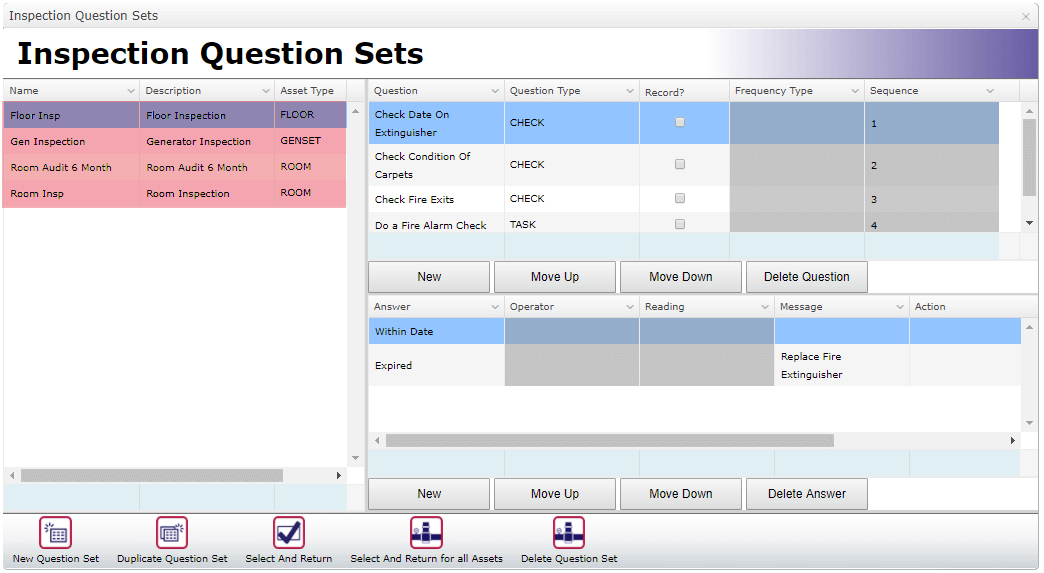
Next step is to start creating the questions
- In the question window (upper right) select the ‘New’ button,
- Create your first question and select the Question type. If you wanted to keep a record of the answer, select the ‘Record?’ check box next to the question.
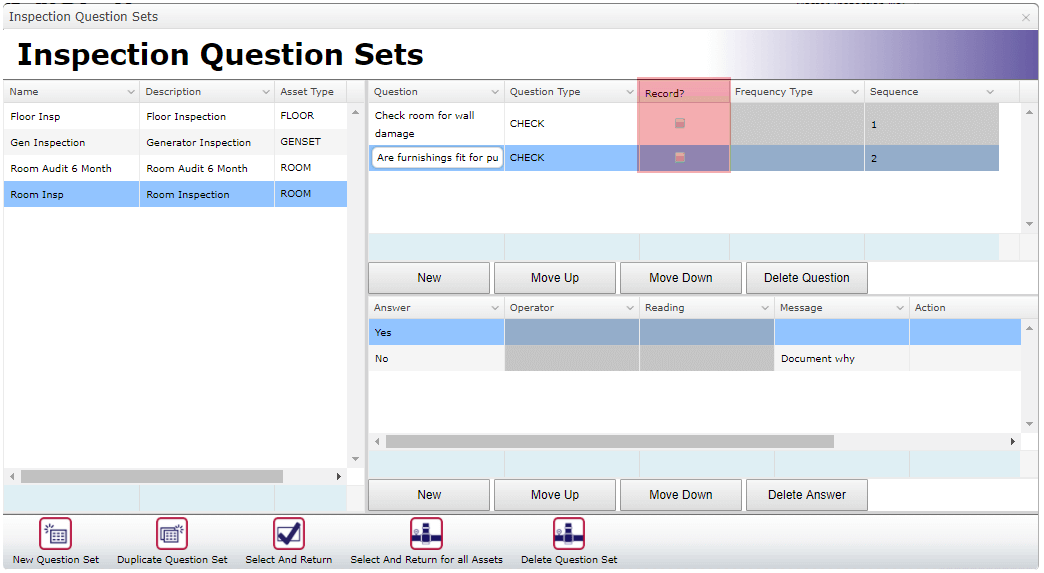
There are three possible question types to choose from:
- Check questions require the user to select their desired answer from a pre-defined list.
- Reading questions are designed to take a reading from the asset.
- While the Task question type is used to ensure a certain task is completed during the inspection.
Each question type is able to print a message and raise a standard job depending on the answer given. An example of each question type can be seen below.
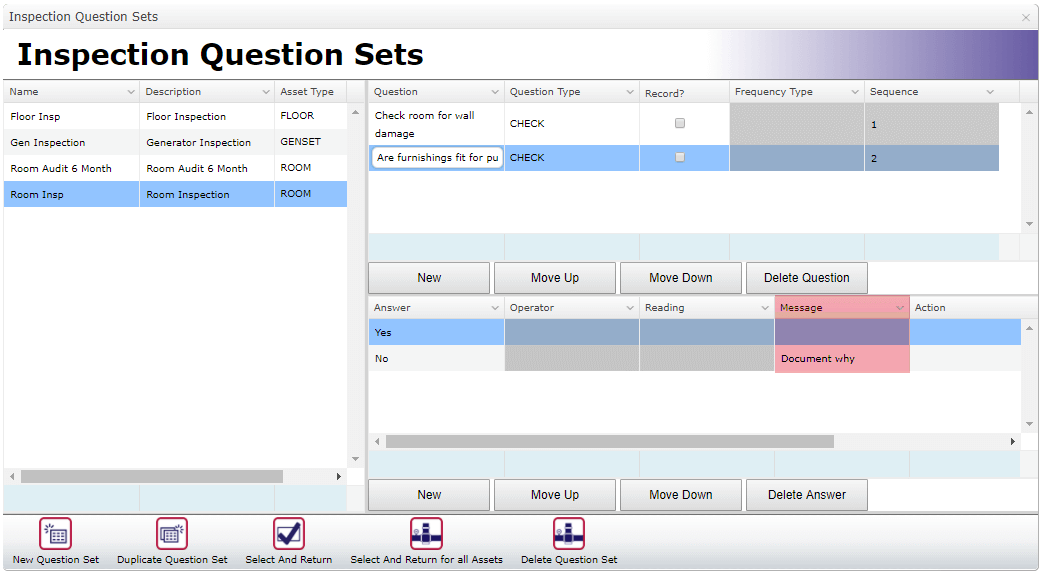
In this image above, if the wall condition is poor, the message “Document why” is displayed to the user.
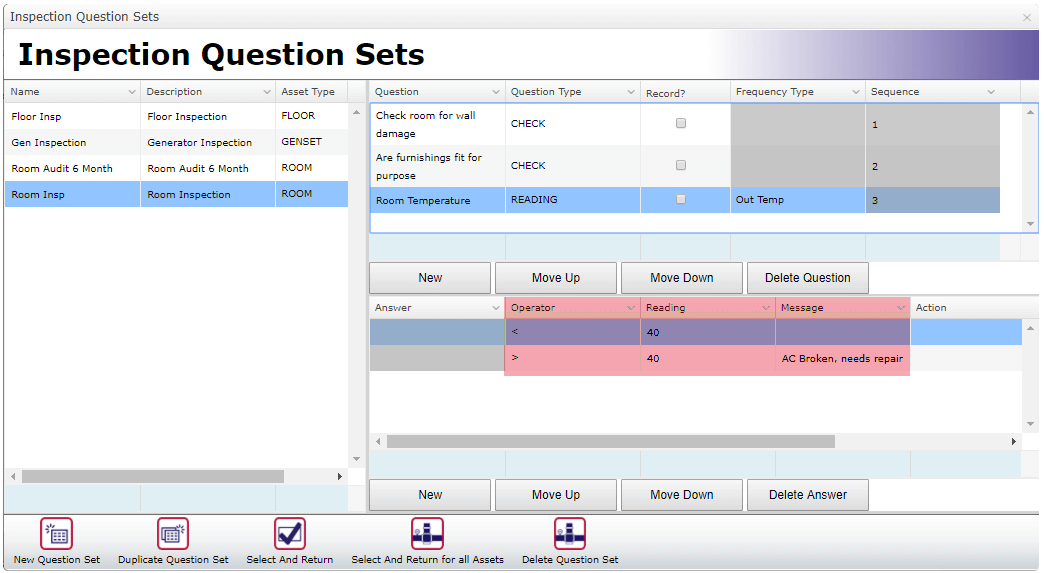
In this example, a job is raised when the temperature is over 40 degrees to fix the Air-conditioning
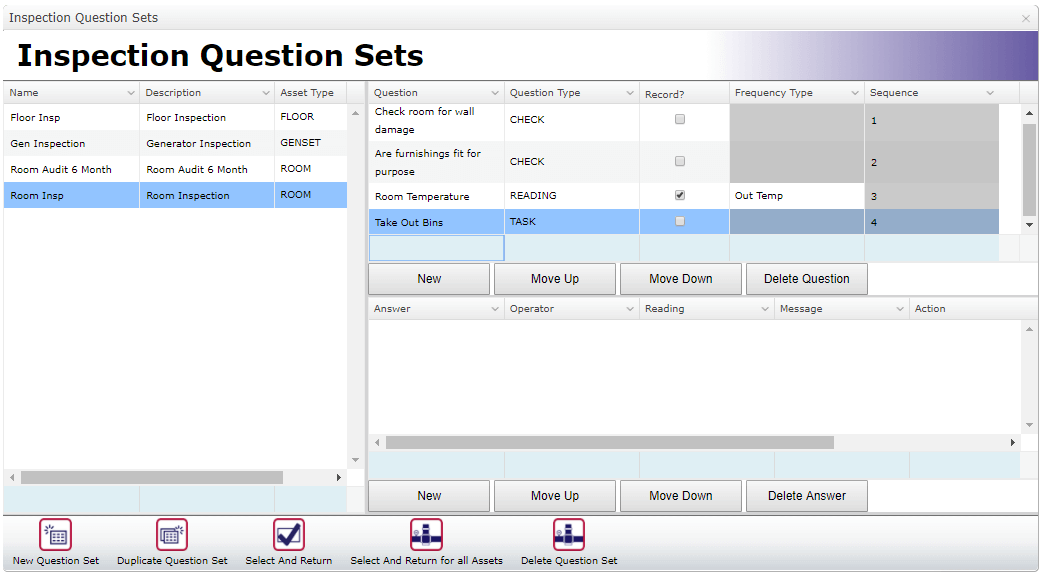
The task option is used to give a task to worker preforming the inspection and does not require any answer fields, but some may be entered if desired.
Once the question sets are complete, close out of the window and do a check over the inspection to confirm your details are correct.
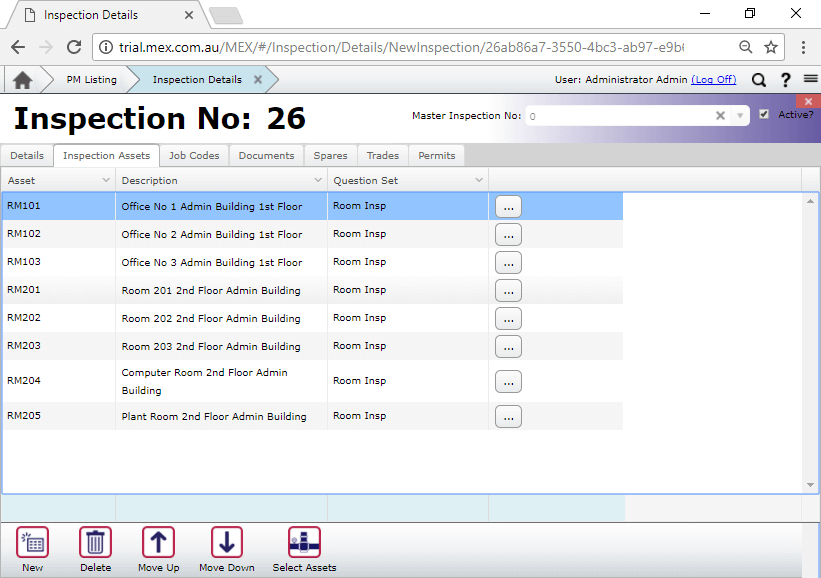
It is now ready to be raised inside the Activator. When the job is raised, an inspection Work Order will appear in the Work Order listing, ready to have the answer details entered, and the appropriate actions raised.
Inspection Work Orders can also be answered off the MEX iOS App. Check out this article to see the whole process: MEX Inspections and the iOS App View
Any Questions?
If you have any questions about this process please contact the MEX Support team at support@mex.com.au or call +61 7 3392 4777.