
Help me Secure my MEX System
In this article we’re going to be looking at how to secure your MEX system, what really is an admin user and scenarios which commonly catch people out when it comes to security?
Implementing security allows you to tailor your MEX Maintenance Software according to the needs of your users. Imagine having an unrestricted system where contractors were creating purchase orders and purchasing officers were deleting assets. Its chaos and control measures need to be put in place!
You really only want your users to see what they got to see and on top of that, you want a history of what each person has done.
Working with Security Switches
When explaining security to someone, the first question asked is: How do I turn on MEX Security?
Start from the Main Menu and go to Control Files. You’ll see at the top left of the screen a button called Security Switches. In here you’ll find six switches with the first being Security System. Flick that on and you’ve turned on security.
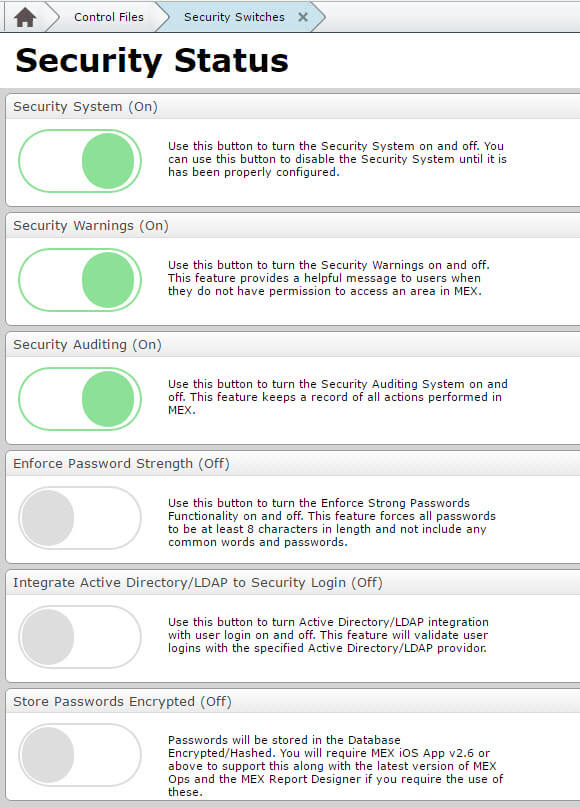
The Security Switches in MEX with Security turned on.
Usually the next question is: what do the rest of the switches do?
Well here’s a run-down of each one:
- Security Warnings - Will let a user know when they’ve been locked out of a form. The alternative? A blank screen with no information.
- Security Auditing - Will track any action anyone does. This is useful for us here at MEX if, let’s say, someone deletes a Work Order and you want to know who did it.
- Enforce Password Strength - Ensures user’s passwords are greater than 8 characters and without common words, like password.
- Integrate Active Directory/LDAP to Security Login – Connects login credentials to a specified Active Directory.
- Store Passwords Encrypted – Encrypts user passwords that are stored in the database.
Creating MEX Users
So now that you’ve got security turned on, every time you log in, you will be asked to enter your username and password.
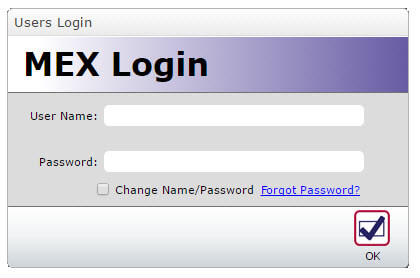
MEX Login Form
To create a new user for your MEX Users - Go back to Control Files and hit the Security Users button.
Here you can create new users, modify existing ones including changing and resetting passwords.
But why create different users?
The bottom line is, traceability and simplification. If you’ve got someone who only uses work orders, why even let them poke around in Control Files?
You can control what each user sees and does. The simpler you make a user’s system the less likely something goes wrong and the less training they need. And each action someone makes will have their name against it.
To create a new MEX user;
- Click New User in the bottom left.
- You’ll see a bunch of fields, but we’re interested in Login Name and First Name. These are the only fields you need to create a new user.
- Fill in the necessary details and close to save
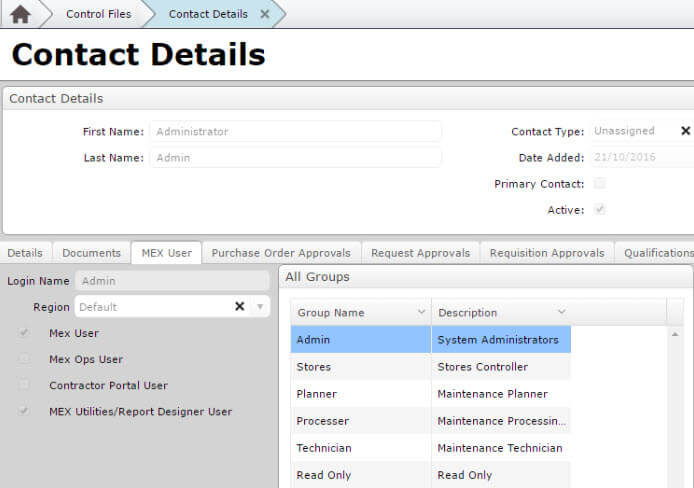
All you need to start with is a First Name and a Login
name to save a new users details into the system.
You can also choose a password by using Change Password or you will be asked to create a password when you first log in.
Now each user is created without any security groups applied to them. You can see a list of groups available on the left hand side and a list of the current users’ groups on the right hand side.

Security Groups are applied to users by adding a selected security group
to a user’s Current Security Groups listing.
Without any security groups applied, the user is not restricted at all, they are effectively an admin. Each group applies security only, they cannot give back access.
Note that if two groups apply security to the same thing, the group which is most secure takes effect. I want to stress, that assigning a user to the admin group will restrict them in some ways. An admin is a user with no security groups.
Security Setup
Instead of using our predefined groups you can always setup your own security groups.
To set this up, do the following
- Go back to Control Files,
- Click the button above Security Users, Security Setup.
- Click Security Groups down the bottom left.
- Create a new Group and go back to Security Setup.
- The group you created will now appear in the user detail form we were in before.
- Before you apply the group to some users, let’s start by restricting the Work Order Details. You can either search the list of Modules on the left hand side for Work Order Details, or what I prefer to do, is open a Work Order and click the System Option Menu (hamburger menu), Edit Security. This will automatically open Security Setup for the Module you were in.
- Before you can apply security to individual controls, make sure to select your new group with the drop down on the bottom left of the screen.
- Now right click a text box and you’ll see three options.
- Form is security to the entire screen. If you make the Form read only, all controls that you see will become read only.
- The next option is the name of the control you right clicked. Choosing an option here will only apply security to that control.
- The last option, mandatory, if set to true will allow MEX to prompt the user to fill in the field before closing out.
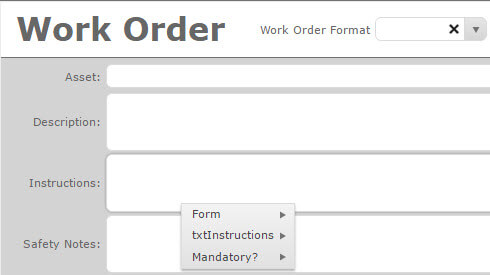
Individual Control Options on a form in security settings
You really have to think about what the user will be doing in MEX. You’re not trying to make life harder, but easier. Even sit down with them and get to know their process and if others use MEX in a similar way.
You can also preview the control with security applied using the Preview button down the bottom left. This is how a user would see the Form if they were assigned to this Security Group. Once you’re happy, go back to the MEX User details and assign a user to it.
Highlight the group on the left side and use the Right arrow button to bring it across. Now, when that user logs in MEX will apply the restrictions that you have set up.
So just dive into Security, give it a go. It’s the best way to learn.
Need a hand setting up your security?
Give the MEX support team a call on +61 7 3392 4777 or email support@mex.com.au
To see more from Maitland Explains, subscribe to the MEX YouTube Channel and watch the collection of Maitland Explains Series