Installing Report Designer in MEX 15
The MEX Report Designer is an additional program that works alongside MEX 15 which allows users to create and edit existing reports in their MEX system. Unlike MEX V15, Report Designer is not web-based, and requires an installation on your local machine – note that although MEX V15 is multi-platform, the Report Designer is a Windows application and can only be installed on a PC.
Installing the MEX Report Designer
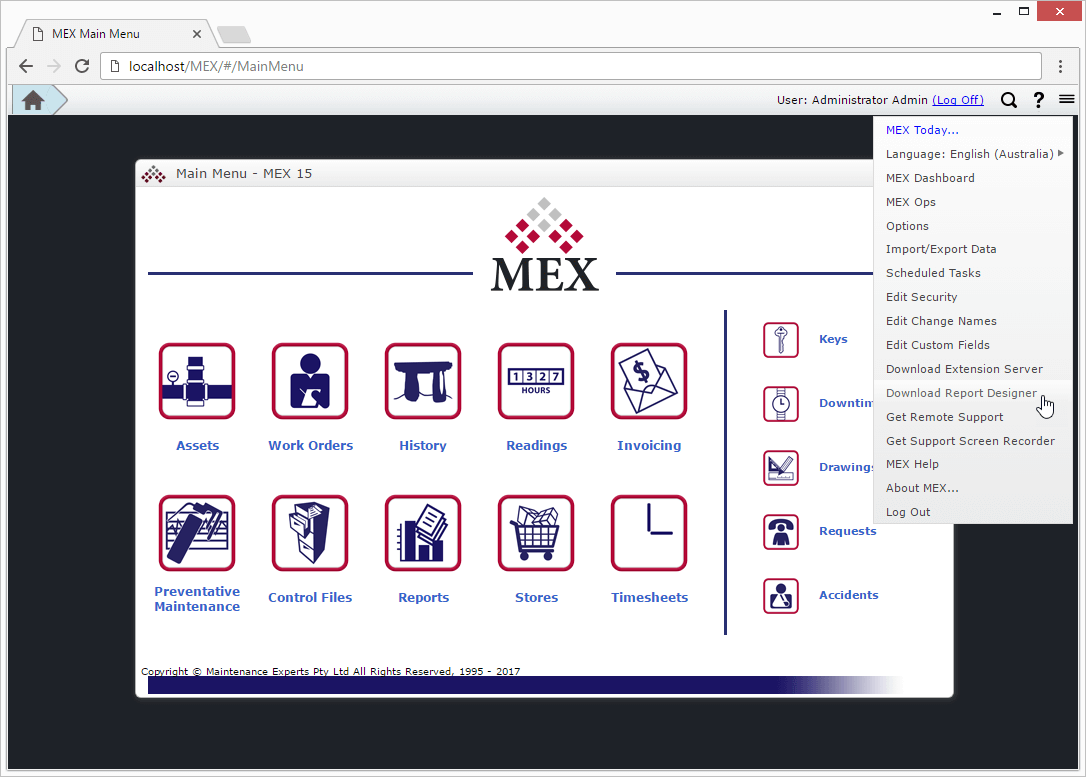
- Select the menu button (three horizontal lines AKA hamburger button) at the top right of your MEX window
- In this menu, you will see an option that says ‘Download Report Designer’ – click on this to download the installer file
Note: sometimes .exe files will be blocked by antivirus programs or other security settings. If the download is failing, check the anti-virus software in case it was blocked. Alternatively, you may be blocked from running .exe files by network security settings – if in doubt, check with your IT department
- Run the downloaded software, MEXReportDesigner.exe - you will see a window open asking for a MEX Web Address; this is the installer prompting for the correct web address in order to connect to your MEX database
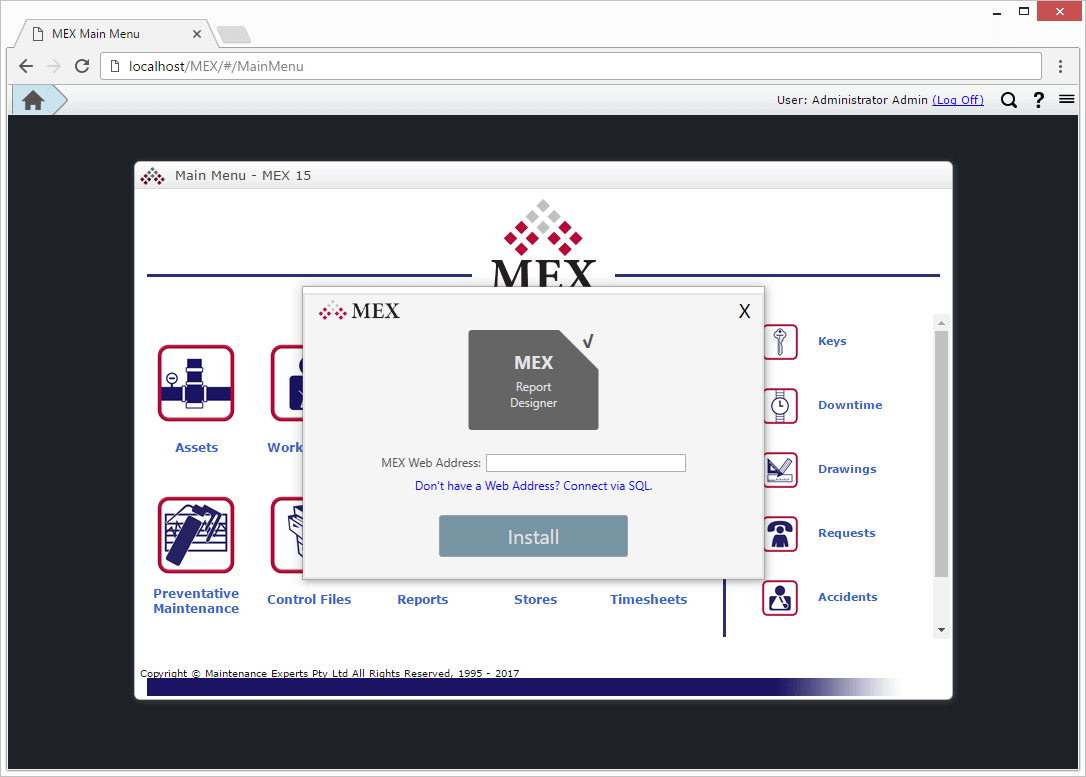
Note: MEX Web Address is the same Web Address used to access MEX in your browser, e.g. https://yourservername/MEXData, including the ‘https://’ and nothing required after ‘MEXData’ Hosted users will just need to paste in there site address for example https://companyname.mex.com.au.
- Select the install option and wait momentarily. The MEX Report Designer will now be installed on your computer, and a shortcut placed on your desktop. Note: if there is no shortcut visible on your desktop, the installer may have not been able to place one on there due to not having the correct permissions. In that case, you are able to manually create a shortcut to the application here: C:\Program Files\MEXReportDesigner\MEXReportDesigner.exe
Connecting via SQL
If you don’t have a MEX Web Address to use, you can connect via SQL details directly into your database. If you’re not sure what these details are, your IT, or the person who is responsible for installing MEX, should have these credentials.
To connect via SQL;
- Select ‘Don’t have a Web Address? Connect via SQL.’
- The installer will display the default connection details, which unless you are installing on the MEX application server itself will not match your actual connection details
- Select ‘Change’ to enter your own database connection details;
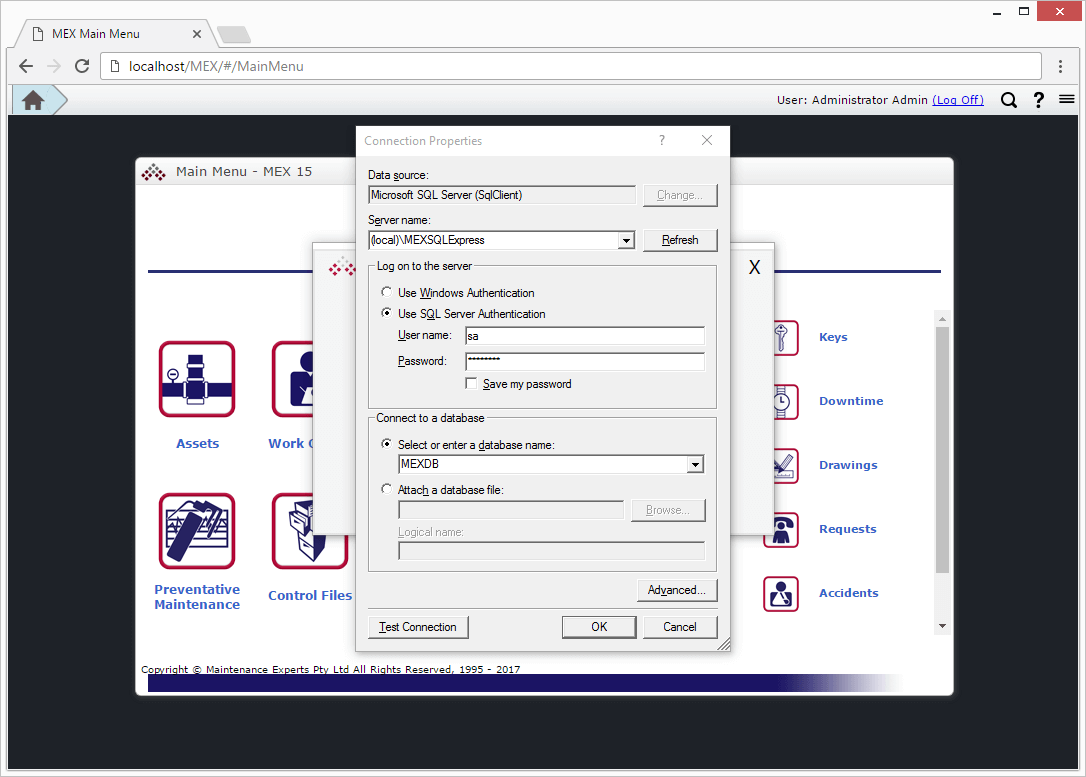
Server name: This is the server where your MEX database is located. This may also be the same as where your MEX application is installed, but not necessarily. It will generally be followed with a backslash (\) and the SQL instance name, e.g. SQLSVR\SQL2012, where the server is called ‘SQLSVR’, and the instance is called ‘SQL2012’
Windows/SQL Server Authentication: It is recommended that you use SQL Server Authentication here, especially if your MEX V15 installation uses this, as it makes the installation process a lot easier. These credentials are not your MEX login details. If you don’t know the login details to get to the SQL instance, check with your IT, or the person responsible for your MEX installation. If you wish to use Windows Authentication, make sure you also check with your IT to have this configured correctly.
Database Name: You’re able to either enter your MEX database name (‘MEXDB’ by default), or select it from the dropdown menu.
Once you’re happy with the credentials you have entered, select ‘Test Connection’.
If you receive this message;
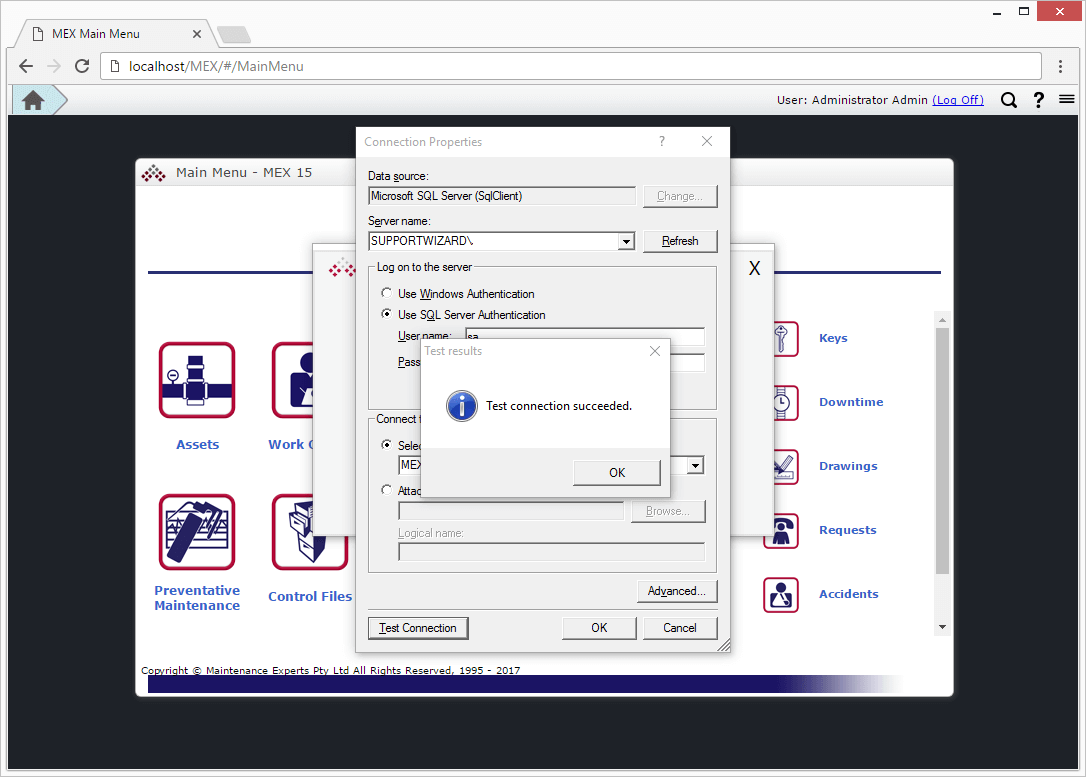
Then the installer has been able to reach your MEX database. Click OK to continue the installation.
If you receive this message;
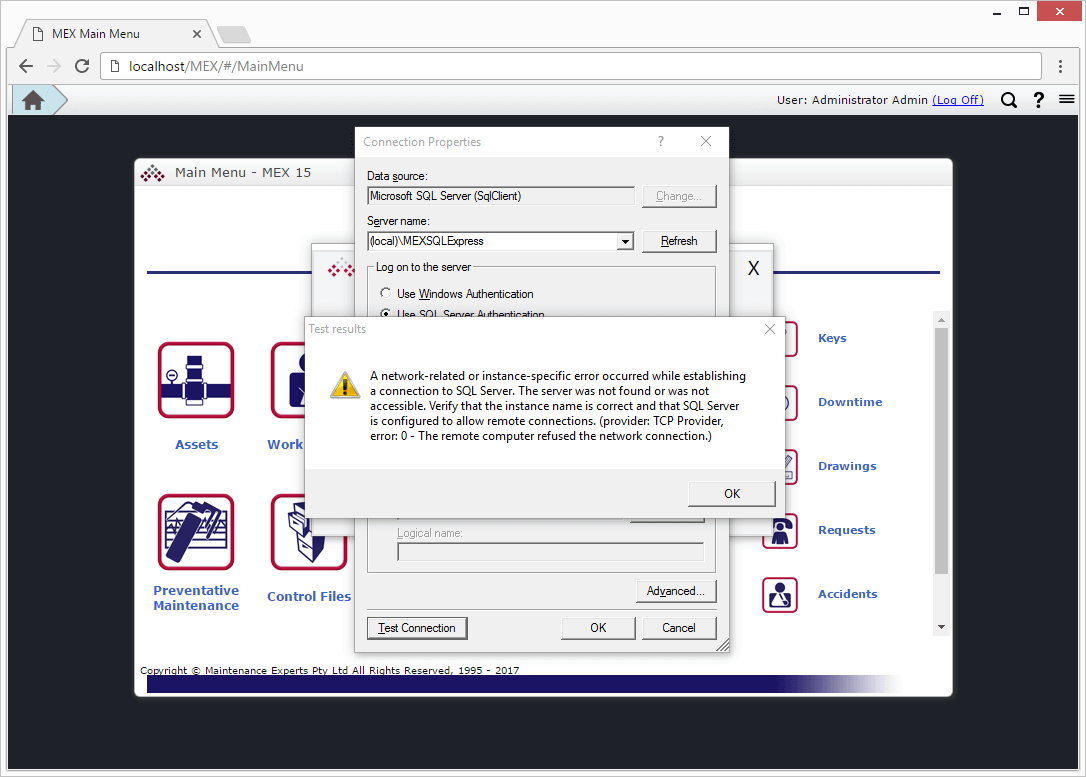
- Double-check that the credentials have been entered correctly
- Verify that the server has been configured to allow remote connections over TCP/IP (Contact your IT)
- Verify that there are no network security settings (e.g. proxy / firewall) blocking this connection (Contact your IT)
- If you have completed to above steps, contact MEX Support to help identify the issue
For more on designing reports, take a look at our blog entry here (How do Reports work in MEX)
If you have any difficulty installing MEX Report Designer, or any further questions, please don’t hesitate to contact MEX Support on +61 7 3392 4777, or at support@mex.com.au