Securing the MEX App with Edit Mode
Today we’ll be looking at MEX Security on our brand-new UWP app, with a focus on the Edit Mode administration interface.
Security Groups in MEX allow system administrators to restrict certain areas of the system. MEX comes with it a set of standard groups and the ability to create your own. For a more secure MEX setup, we recommend that each user in your system be assigned a particular security group.
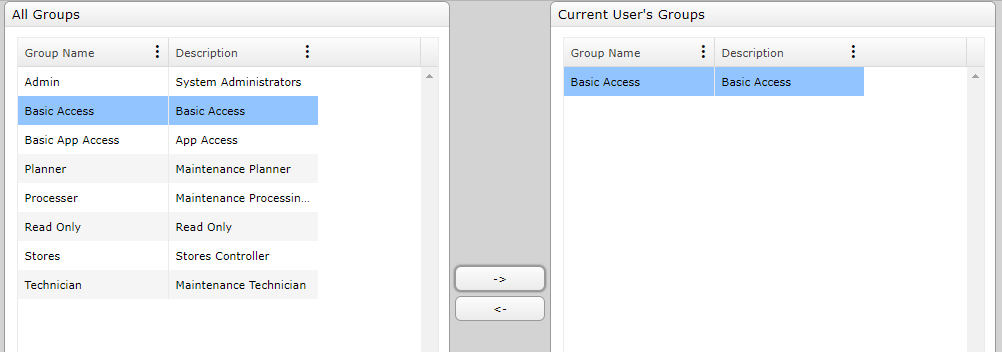
Security Groups in MEX
For those users that will be using the MEX App, upon logging in, if a security group has already been assigned to the user, all settings for that security group will also be applied on the app.
For demonstration sake, I will be using the Edit Mode Administration Interface to Create a brand-new security group on the app:
- Editing security
- Setting mandatory fields
- Changing the names of fields
- Adding custom fields onto different screens
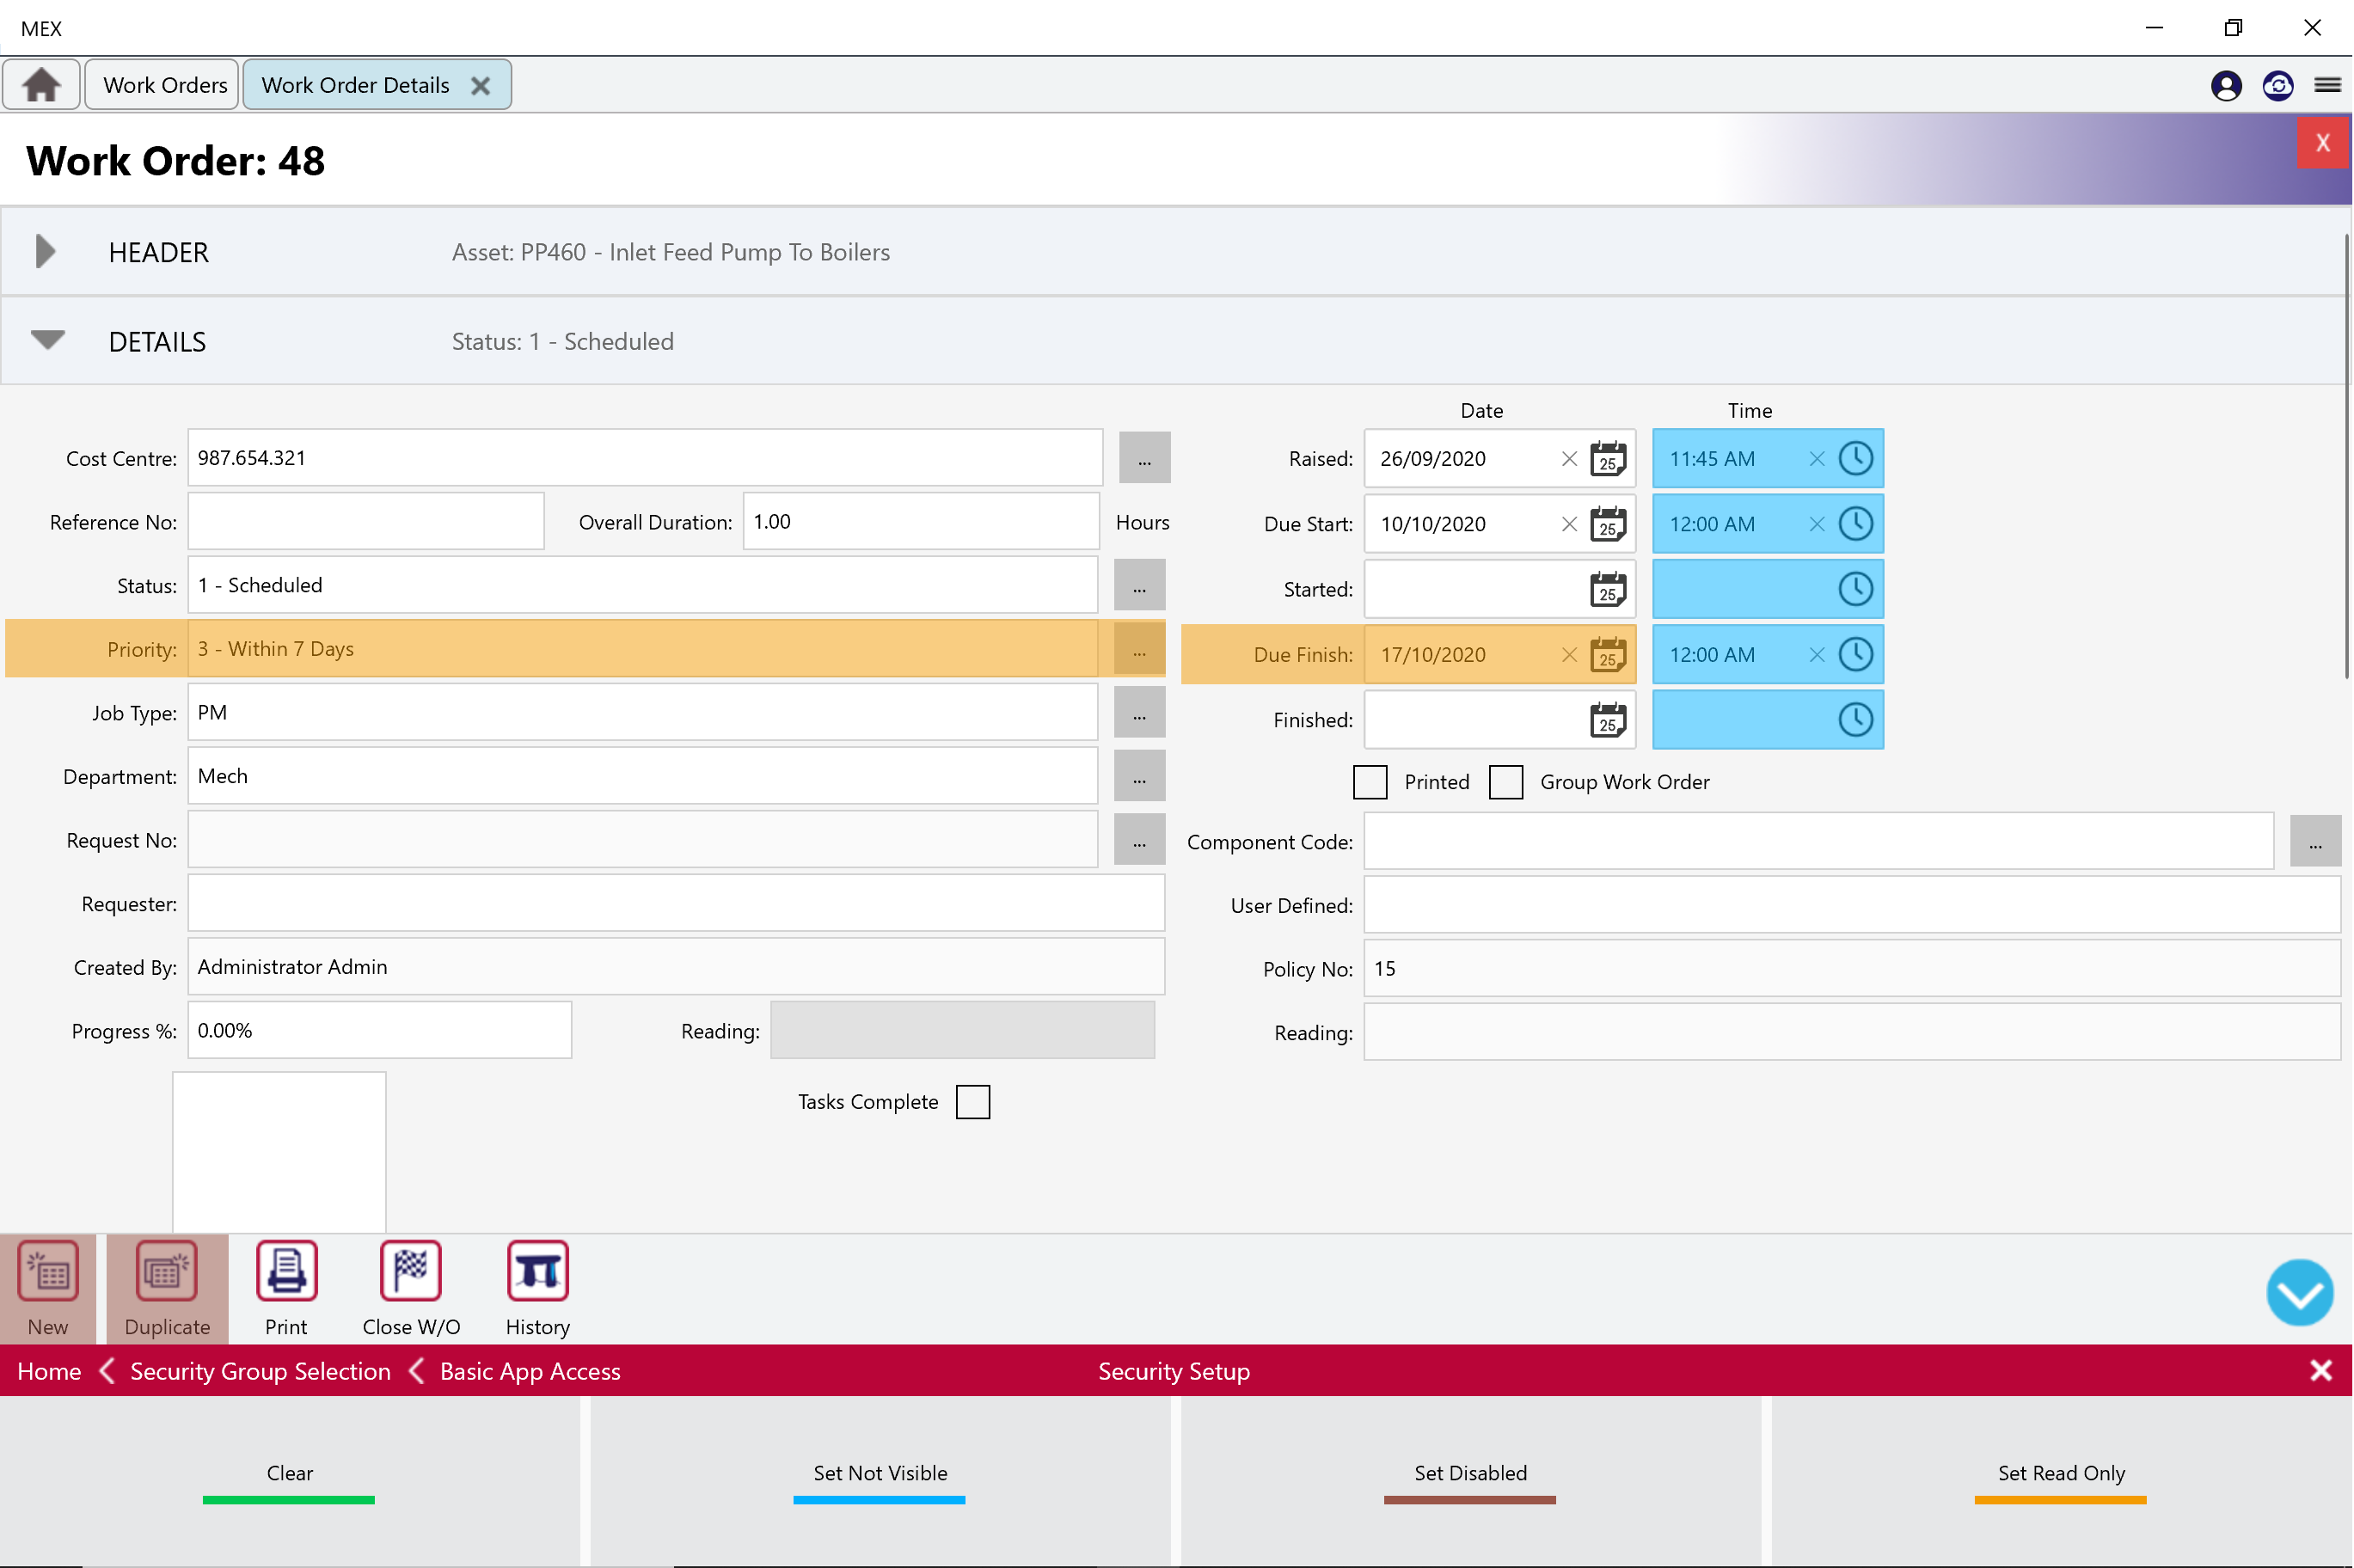
Working in the Work Order details listing - The most commonly used module of MEX. A number of tabs will need to be removed, a few fields will be set as mandatory, and I will rename a couple of fields as well.
Access Edit Mode from the hamburger menu. So, I tap on the menu option in the top right corner of the screen, and then select Edit Mode from the displayed options.
Up pops the Edit Mode Home menu at the bottom of the device’s screen.
When I want to simplify screens in the MEX App, I’ll use the MEX Security model. I’ll define a Security Group, and then I’ll apply various restrictions to that Security Group so that any users that belong to that group, will only see what I want them to see on their device. To use Edit Mode for Security I tap the “Security” option in the Edit Mode menu, and then I either have to select an existing Security Group to apply my changes to, or I can add a new group.
I’m going to add a new group, and I’m going to call it “Basic App Access”. To add a new group, you tap the plus button on the bottom left-hand side of the screen here, and I’m going to enter the details of my new group.
So now I’ve created a new Group called “Basic App Access” and I’m going to tidy up the Work Order screen for those users.
First thing I’m going to do is get rid of the unnecessary tabs/accordions. Do note that, tabs on the desktop version are referred to as Accordions displayed vertically in the details form of the new app.
Once I’ve selected a Security Group, then all of these options become available to me for what I can apply to the controls for that Security Group. I want to remove some accordions, so I choose the set not visible accordion here and then I can tap on anything that I don’t want to be visible to the users in that Security Group. Now I’ve removed five accordions from the Work Order details screen.
As I apply the options to the screens, you can see that anything I apply a setting to becomes shaded in using the colour that’s appropriate to the option that I’ve applied.
In addition to tapping on individual controls I can also select an area. My organisation only uses dates, it doesn’t use the various time fields, so I can just highlight the area of the screen that contains the controls that I want to remove. And now all of the time fields have been removed from the screen for those users.
I also don’t want my basic app users to be able to change the priority, or the due finish date on a Work Order. So, what I’ll do is I’ll set those fields as read only. I’ll choose the read only option, and then tap on the fields that I want these users to be able to see but not edit. Finally, I don’t want them to be able to tap on the “new asset” and “duplicate” buttons, and that’s where ‘disable’ comes into play. When I disable something, it’s still left on the screen but it’s greyed out and users are unable to select that field or button. I’ve also decided to remove some unnecessary fields from the Spares accordion.
In order to be able to navigate around MEX again, I’ve got to turn off the security configuration. I do this by tapping on ‘Home’, and that allows me to navigate freely in the app.
I’ve decided to take the costing out here. Back to Security, Not Visible, and tap on what I want to remove.
Back to the details accordion.
The next thing that I’d like to do is make the Priority and the job type Mandatory. These users won’t be able to exit the details of a work order unless that priority and job type are filled in. To make this happen, I select Mandatory, and make sure that my Security group is there because Mandatory fields are applied at a security group level, and then I get ‘zero value allowed’ and ‘zero value not allowed’ options at the bottom of the app. I’ll select the ‘zero value not allowed’ and then tap on priority and job type. Those fields are now mandatory.
If I want to remove a restriction from a field, (and remember that I can tell what fields have restrictions applied to them because they’re shaded in) then in both the Security setup and the Mandatory setup, I can select ‘clear’ and then tap on any restricted fields to remove the restriction.
I’ll just reapply those two changes.
The next thing that I’m going to do is I don’t like the term ‘Account Code’, my organisation uses ‘Cost Centre’ for that. So, I’ll select ‘Change Names’ in the Edit Mode toolbar. Name changes are applied to all users, not just users that belong to a particular Security Group. Once I’ve selected ‘Change Names’, I can tap on any label (a label is just any text that applies to a control, for example that’s the label for the Account Code dropdown. Down here ‘New’ is the label for the new button). I’ll tap on my label, then I can highlight the text, and replace it. So now that field will display ‘Cost Centre’ rather than ‘Account Code’ for all users.
Whenever a field has had its label changed you can see that a small red icon is placed to the left of the label to indicate that field’s label has been changed. If I want to revert the change, and go back to the standard label, then I tap on that little icon, and that will remove the change. There we are, back to ‘Account Code’. I’ll just apply it again.
The last thing that I’m going to do is add some extra fields onto the Work Order.
Do note that with the MEX App, only those custom fields that have already been added to the main MEX client can then be added to the app’s custom fields.
In the Edit Mode introduction video, we added a large text field for users to enter any incidental notes into.
I begin by tapping the ‘Custom Fields’ option in the Edit Mode toolbar. Now that does two things, the first thing that it does is it displays a list of all the custom fields that have already been added to this area the full version of MEX. The second thing that it does is it adds a green grid onto the areas of the screen that I can add fields to.
I can add fields onto the screen by either using the Auto Fill Option, which will automatically add all your custom fields for this particular form/listing, just as they are in the bowser-based version. Or by individually adding each field onto the green grid. Let’s do the former and tap the Auto Fill option.
Once the fields are added, a black indicator appears on the bottom right-hand corner of a selected field. To resize it, I can tap and hold this corner and drag it out to size the field in that way. There we go, that’s a good size field.
I can also drag and drop my fields to a better spot on my screen. Now when I exit the Custom Fields configuration area, you’ll see the field is fully operational. But to be safe its always best to close out of that area and returning to it to freshen it up.
And here we are, with a large Notes field.
Go through each of your Forms and listings on the app and add in the Custom fields available to you. If there are any fields I do not want to show, press and hold on the particular field and you will be presented with two options – Details and Delete. The details will show you all configured details for this field, only edited though the MEX Browser version. And to delete the field. Lets go ahead and get rid of this field from this form.
Now we’re going to see the results of my configuration. I’m going to login as a user that belongs to the Basic App Access Security Group that I set up before. When we have a look at the Work Order details, you’ll see for that Security Group, all the extra tabs have been removed, and if I attempt to edit the Priority or the Job Type, then those fields are Read Only for me. You can also see that my Custom Field has been added here, and that the ‘Account Code’ has been renamed to ‘Cost Centre’. Now remember that Name Changes and Custom Fields are not limited to a particular Security Group, when I change a label or add a custom field, it’s applied to all users across the system.

For more information about the New MEX app, Security and Edit Mode go to ourNew MEX Features page.
If you have any questions please contact our support department at support@mex.com.au or call +61 7 3392 4777.