
Understanding Work Order Workflow
Let’s take a look at a typical Work Order workflow in MEX.
This process starts in the Asset Register with an Asset that requires maintenance of some type and finishes with a completed job in the Work Order History of MEX with all relevant details recorded.
What’s involved?
Here is a typical Work Order Workflow:
Asset requires work > Work Order Created > Work Order is actioned, and details are recorded > Work Order Closed and History is recorded.
Now in MEX there are two ways to manually create Work Orders,
- Via the Asset Register
- or by creating a Work Order and assigning an Asset to it
In the example below, Asset RM102 was found to contain a damaged table so a replacement is required.
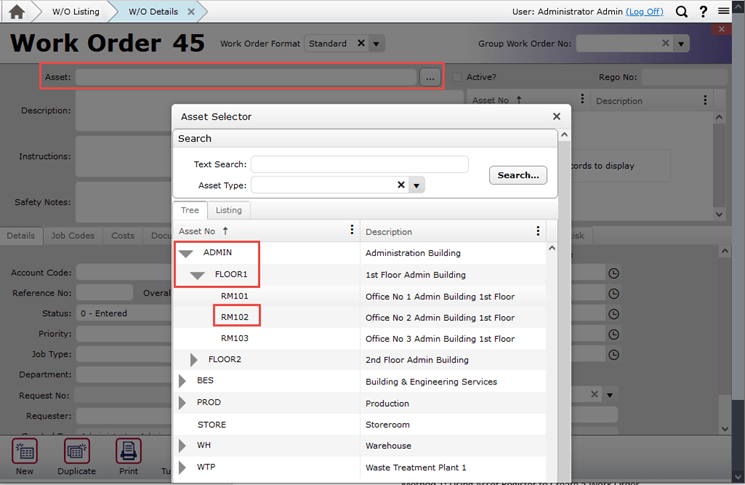
Our first step is to create the Work Order and assign Asset with the issue to it.
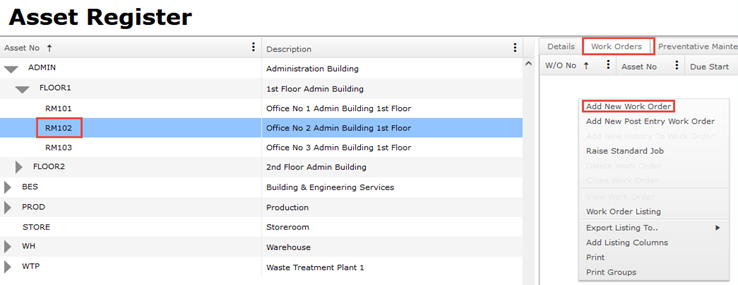
Method 1: Using Asset Register to Create a Work Order
Method 2: Creating new Work Order from the Work Order Listing
Step 2 is to then fill in the Work Order Details with all relevant data. This will usually include any Times, Costs, Documents or Tasks that need to be actioned during the Work Orders completion.
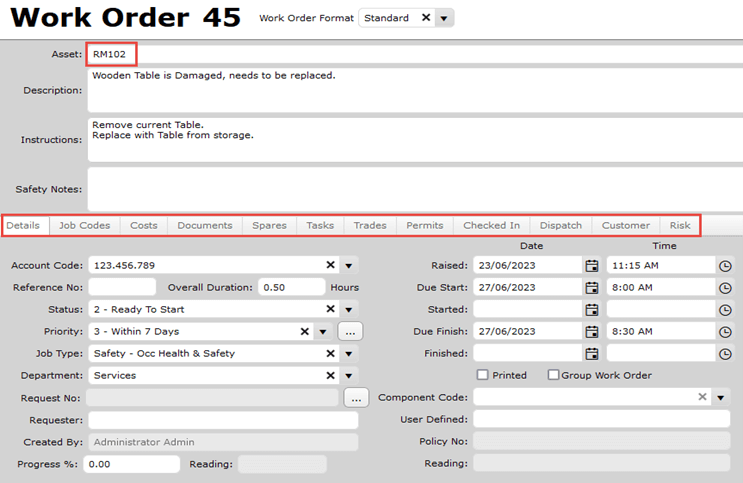
Details have been filled in for the Work Order to then be carried out.
Once the job is complete, our next step is to close the Work Order with all applicable details filled out and then filling out History.
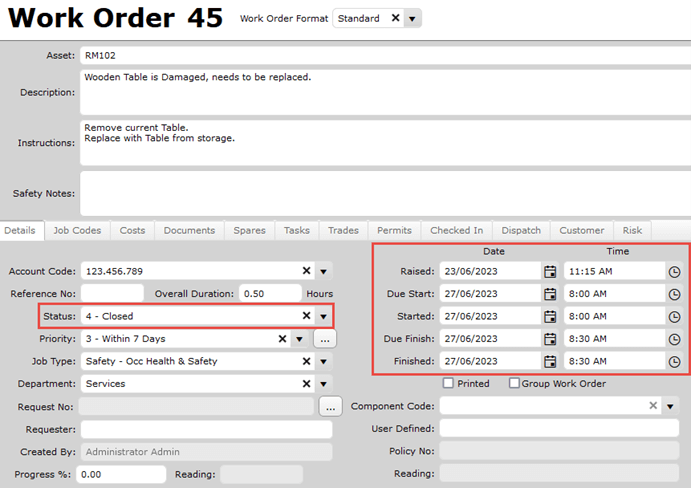
The Date details have been filled out for completion and Status set to Closed.
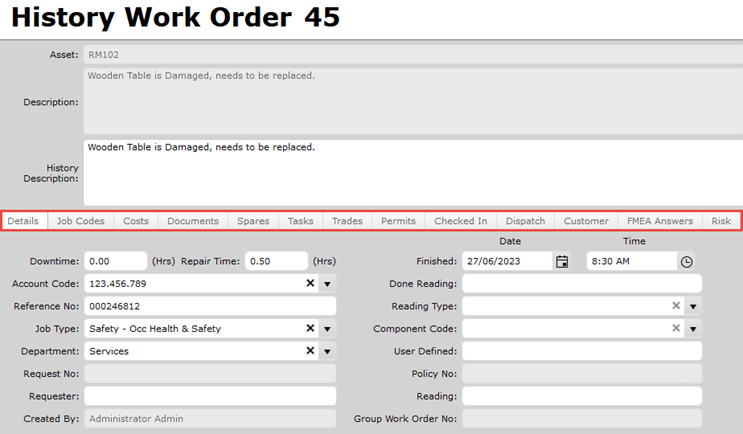
The History screen has been filled out with any added details. Tabs are also History specific.
At this point the job is completed, and Workflow is considered done.
Here at MEX, we like to Make it Simple! And likewise, working with Assets and Work Orders reflects this.
If you have any questions about this, our support team is always happy to help at support@mex.com.au or call +61 7 3392 4777.