
Working With APL in MEX
The Asset Parts List (APL) in MEX is designed to manage the spare parts associated with each of your Assets. Making it easier to identify the parts that are asset specific. It should be noted that the APL functionality requires you to have the Stores Module for your MEX System.
Let’s take a look at an example.
As part of your Asset Register, you have 3 different car manufacturers. Each of those manufacturers will have a specific type of seat cover that fits perfectly for their cars but not any other manufacturer’s cars. Here you can have the specific seat cover type added as an APL to your car Assets that have the specific manufacturer.
How to create an APL for your Asset
There are 4 methods to add APL’s to your Assets:
- Through the Asset Register, you can select an Asset and then assign which catalogue items are its APL’s
- Through the Catalogue Item, you can select which Assets it will be listed in for the Assets APL’s
- Using ‘Add on the Fly’ on a Work Order, as you add catalogue items to the spare parts list, you can decide if you want these as part of the APL as well.
- Through the Asset APLs import, You can import a list of Assets with their respected catalogue item to be added as an APL.
Method 1
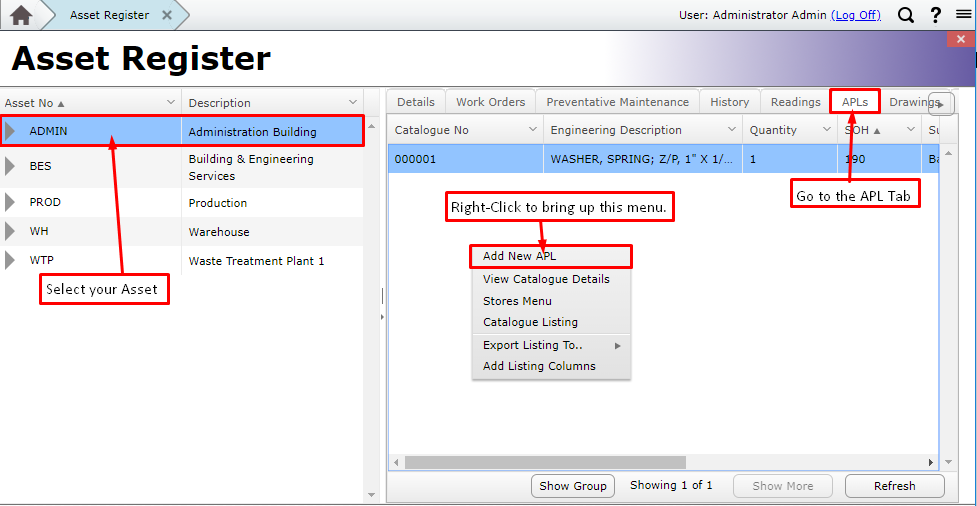
- Go to the Asset Register
- Select your Asset
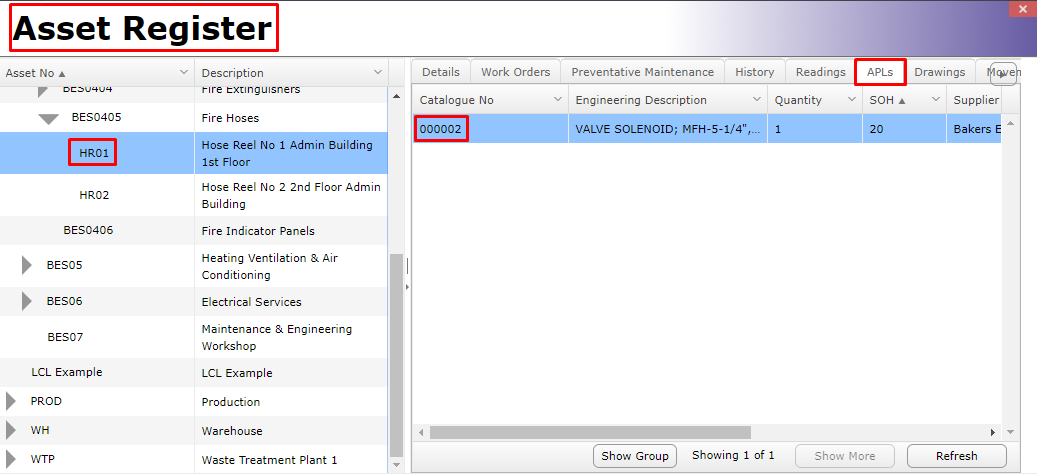
- Go to the APL Tab
- Right-Click to bring up the menu and select Add New APL.
- Select the item to bring across
- Press the right arrow.
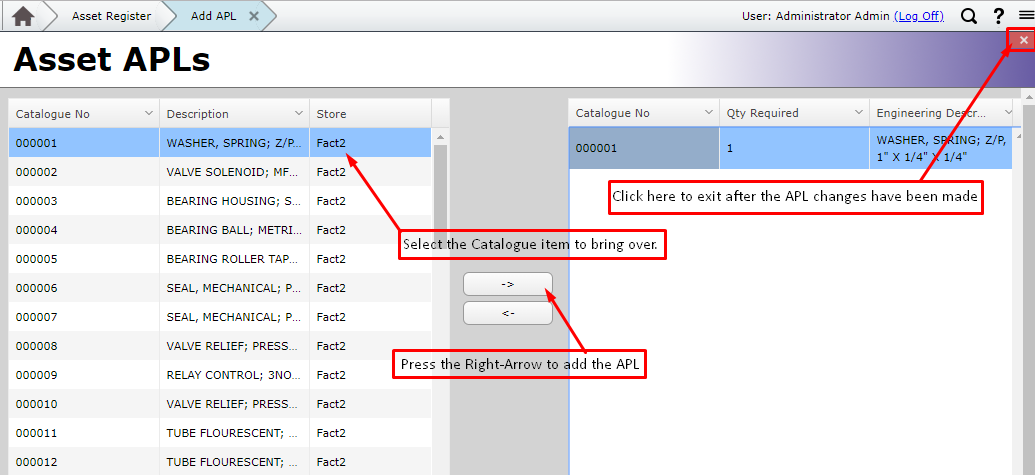
- Close the Asset APLs form
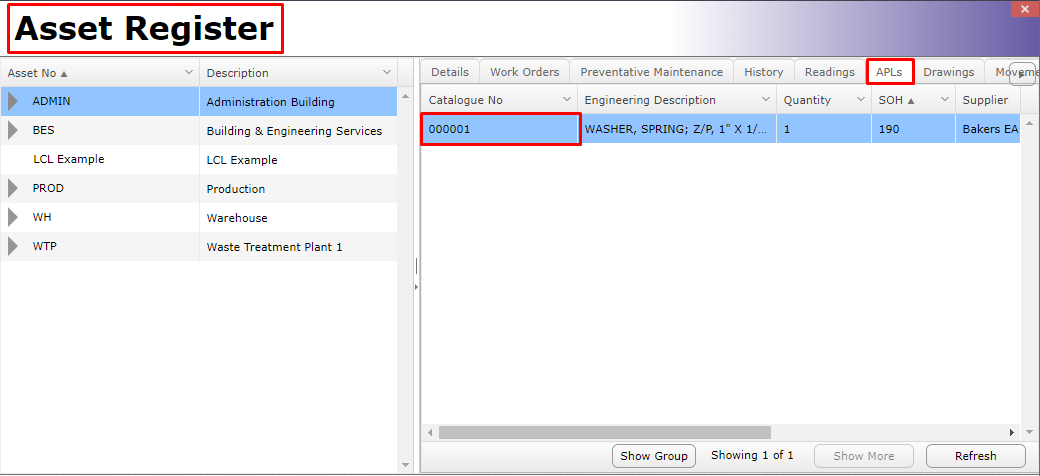
Your Asset Register will now include the APL’s in the APL Tab.
Method 2
- Go to Stores -> Catalogue Listing -> Catalogue Details - > APL Tab
- Choose a method to add your Asset. New is if you know the name of your Asset and Add Asset will let you search the Asset List.
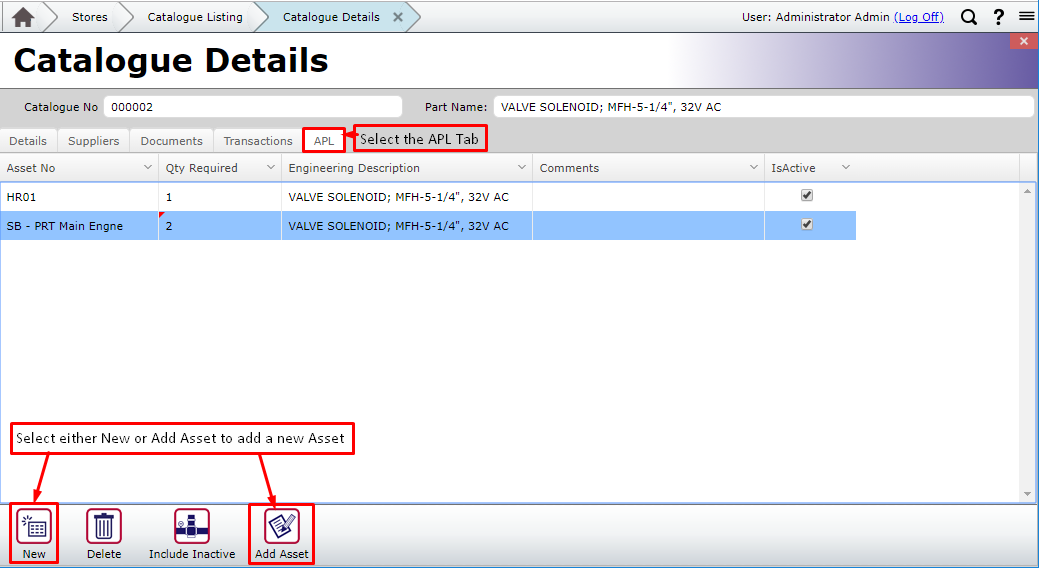
If you are using the Add Asset method then you will have a new popup window show up to navigate the Asset Register.
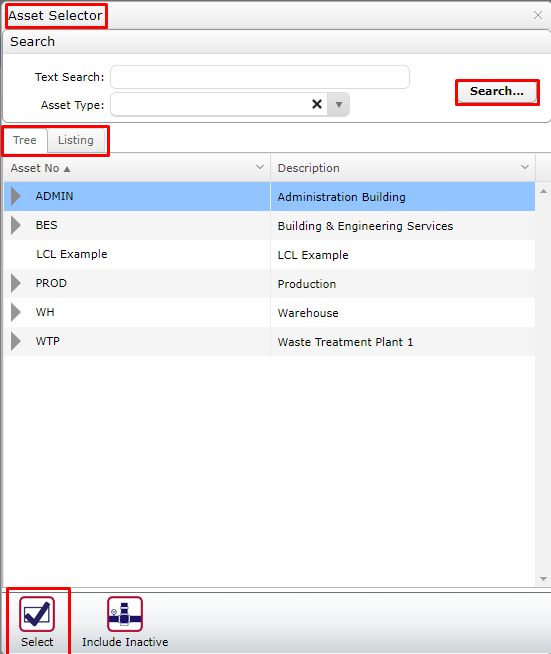
Here you can search for the Asset you’re your looking for by text or if you know its location in the Asset Tree.
Method 3
- Go to Work Order -> Work Order Details -> Spares Tab
- Choose your option to add a new catalogue item
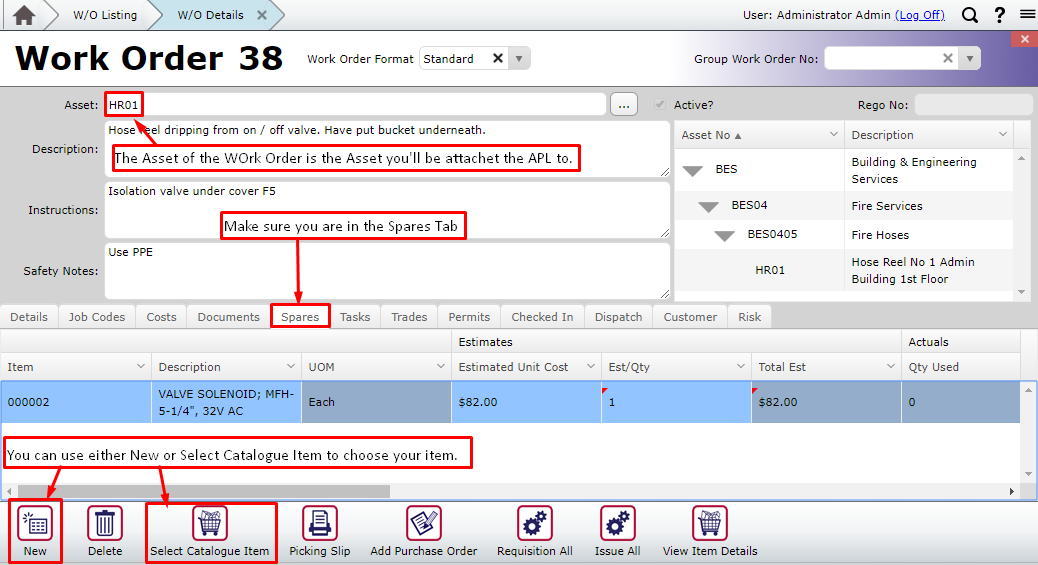
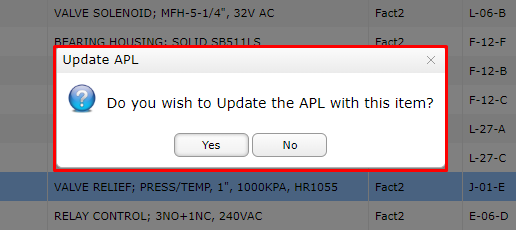
- You will get this popup box if the catalogue item isn’t already an APL and if you have the ‘Add on the Fly’ option turned on in your User Settings.
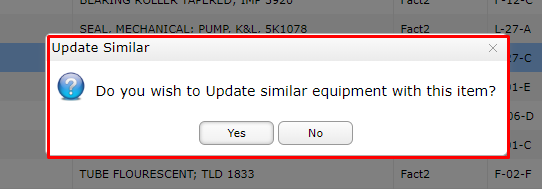
- If you have selected an Asset that has similar equipment to it (e.g. Same Manufacturer and Model Number) then you will be given the popup option to update the similar equipment with the APL as well.
If we go back and check in the Asset Register for the Asset we were working on in the Work Order and check the APL Tab, we should see the APL’s that we added are now included here.
Method 4
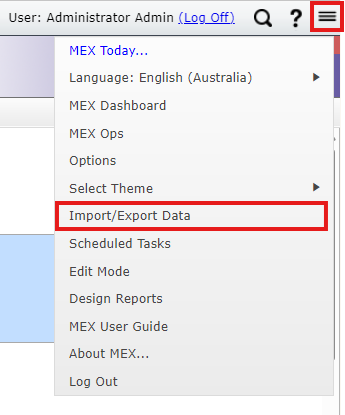
MEX also allows you to add Asset APLs via the Import/Export feature. To access this, click the hamburger menu in the top right corner and select Import/Export Data.
From this screen, download the Import Template or a sample file to format your data correctly. Ensure that both the Asset Number and Catalogue Number match those in your system. If you have duplicate asset numbers, include the Asset ID to import to the correct asset.

Removing APL’s from your Assets
Chances are that you’re going to end not needing a particular part as an APL for your Asset anymore. This is where we have the option to remove the APL as well.
There are 2 methods to remove APL’s:
- Through the Asset Register – Mostly the same method as adding the APL, only now you’re using the left arrow to remove your selection rather than adding to it. Please be aware that you need to click on ‘Add new APL’ in order to get to the screen to remove them
- Through the Catalogue –All you need to do is select the Asset you don’t want it linked to anymore and delete it.
Go through and add a couple of APLs’ to your Assets and see how this works for you.
If you have any questions or issues with APL’s please contact MEX support at support@mex.com.au or call +61 7 3392 4777